How to Add Products & Services in Squarespace
If you're ready to start selling products or services through your Squarespace website, you’re going to want to read this article. Uploading pretty photos and adding a bit of a description isn’t the only thing that needs to happen when adding a new product. SEO, formatting, and the sales page itself are equally important.
In this tutorial, I’ll walk you through the step-by-step process of adding a product or service, optimizing it for search, and formatting the product page so it’s easy for your customers to understand and purchase from.
By the end, you’ll have a fully functioning product page that is set up for both search visibility and conversion.
How to Add Products and Services in Squarespace
Squarespace allows you to sell several different types of products, including physical products, digital downloads, services, and gift cards. You can also create subscription products, although we'll cover monthly memberships and subscriptions in a separate tutorial.
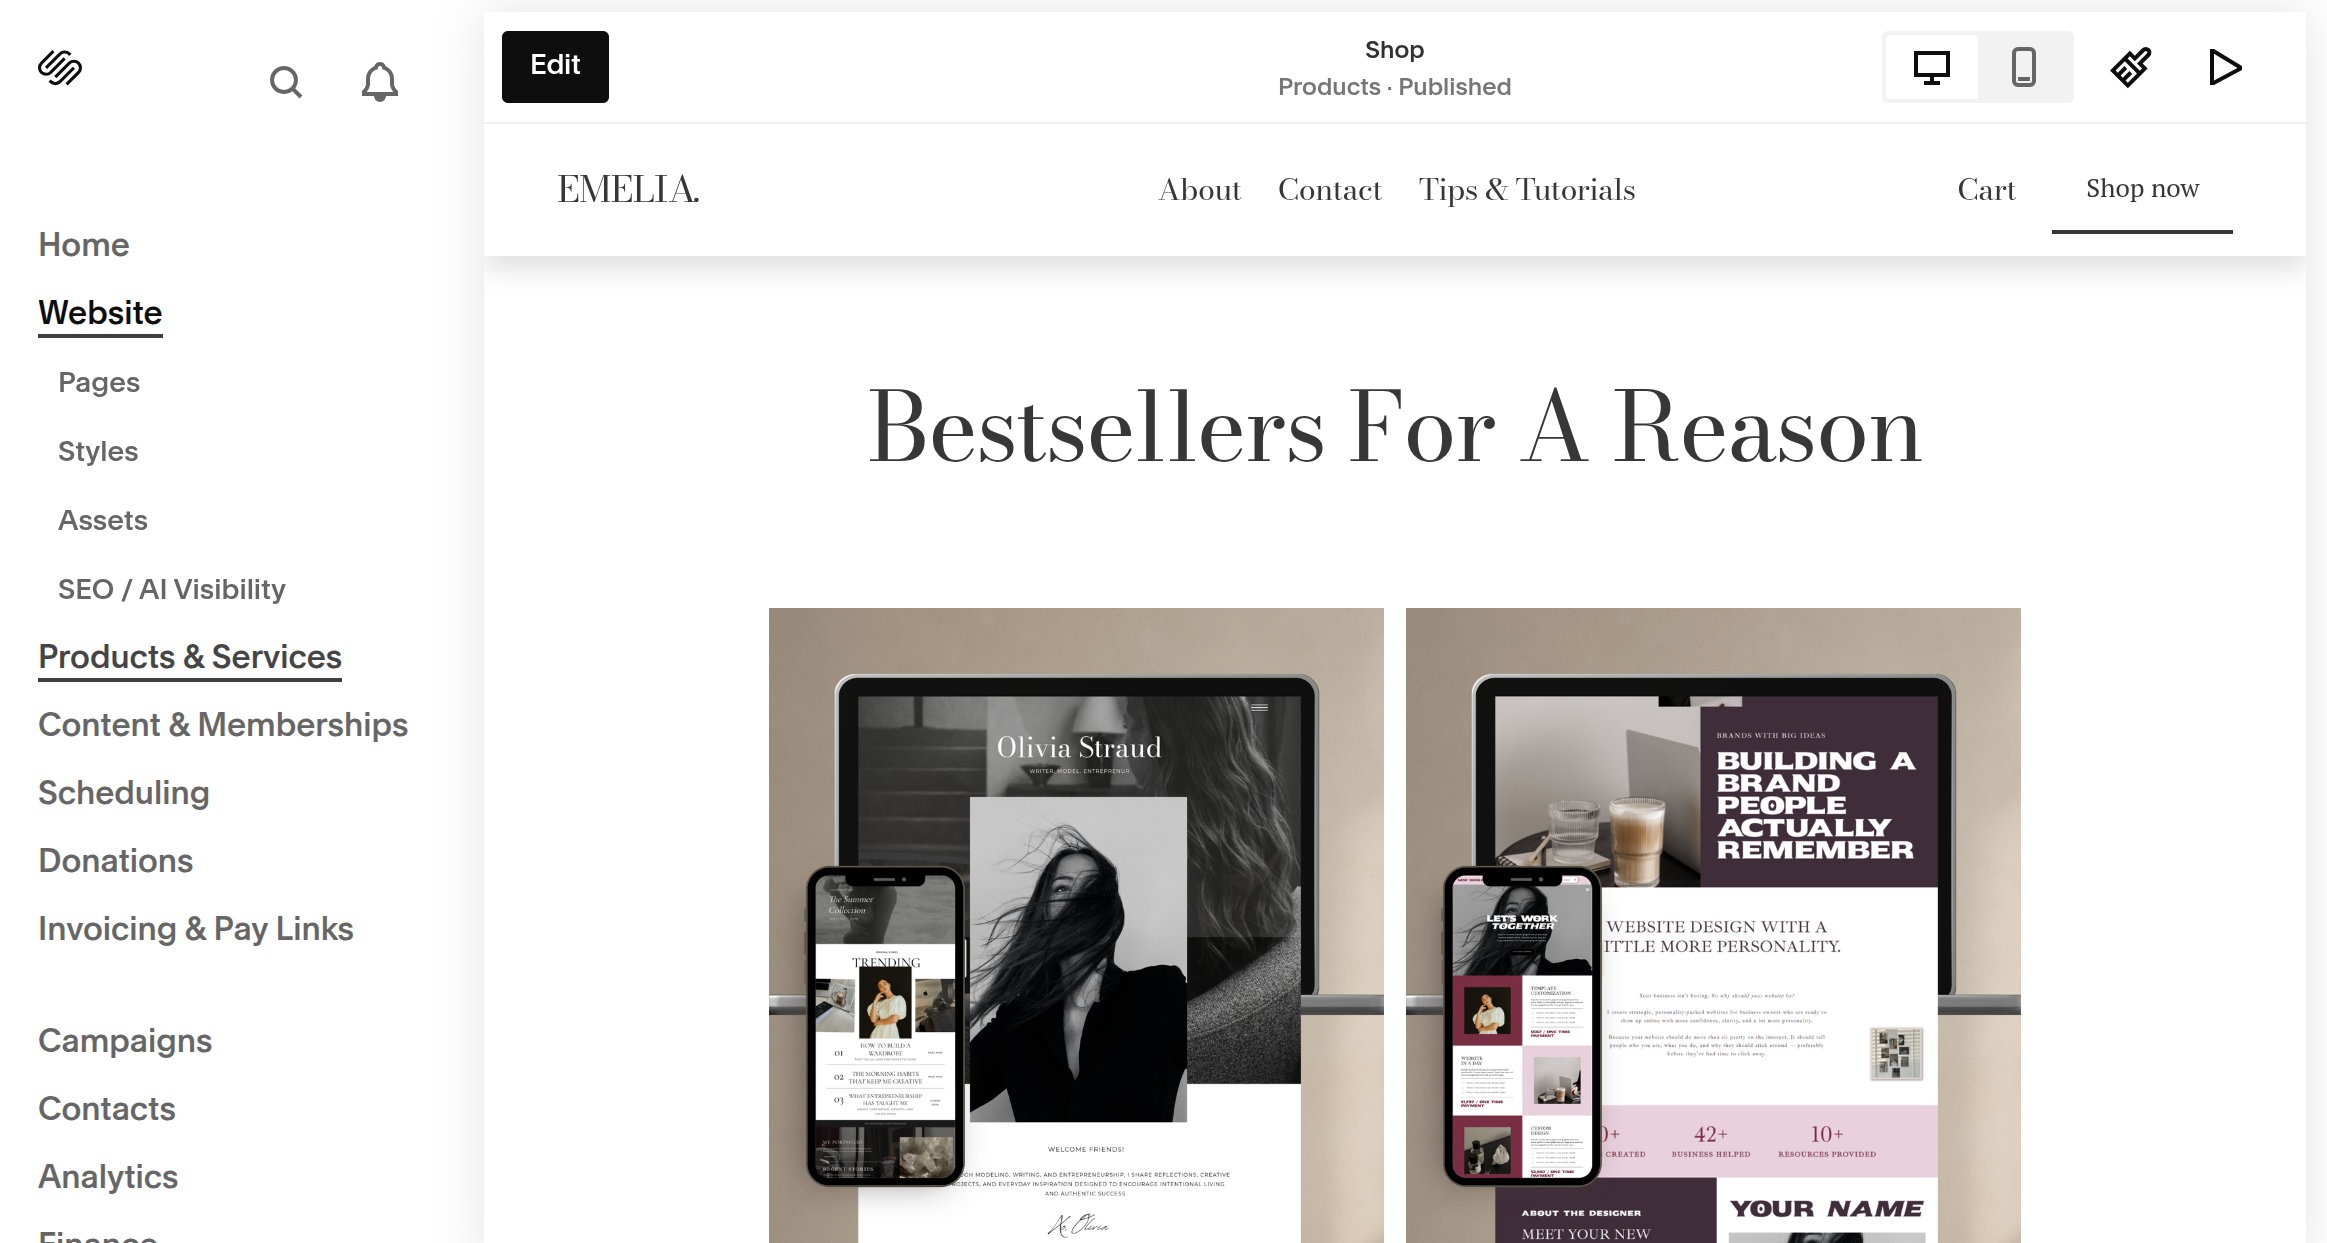
Step One: Open Your Products Panel
From your Squarespace dashboard, click on the Product & Service tab.
Under that tab click Products
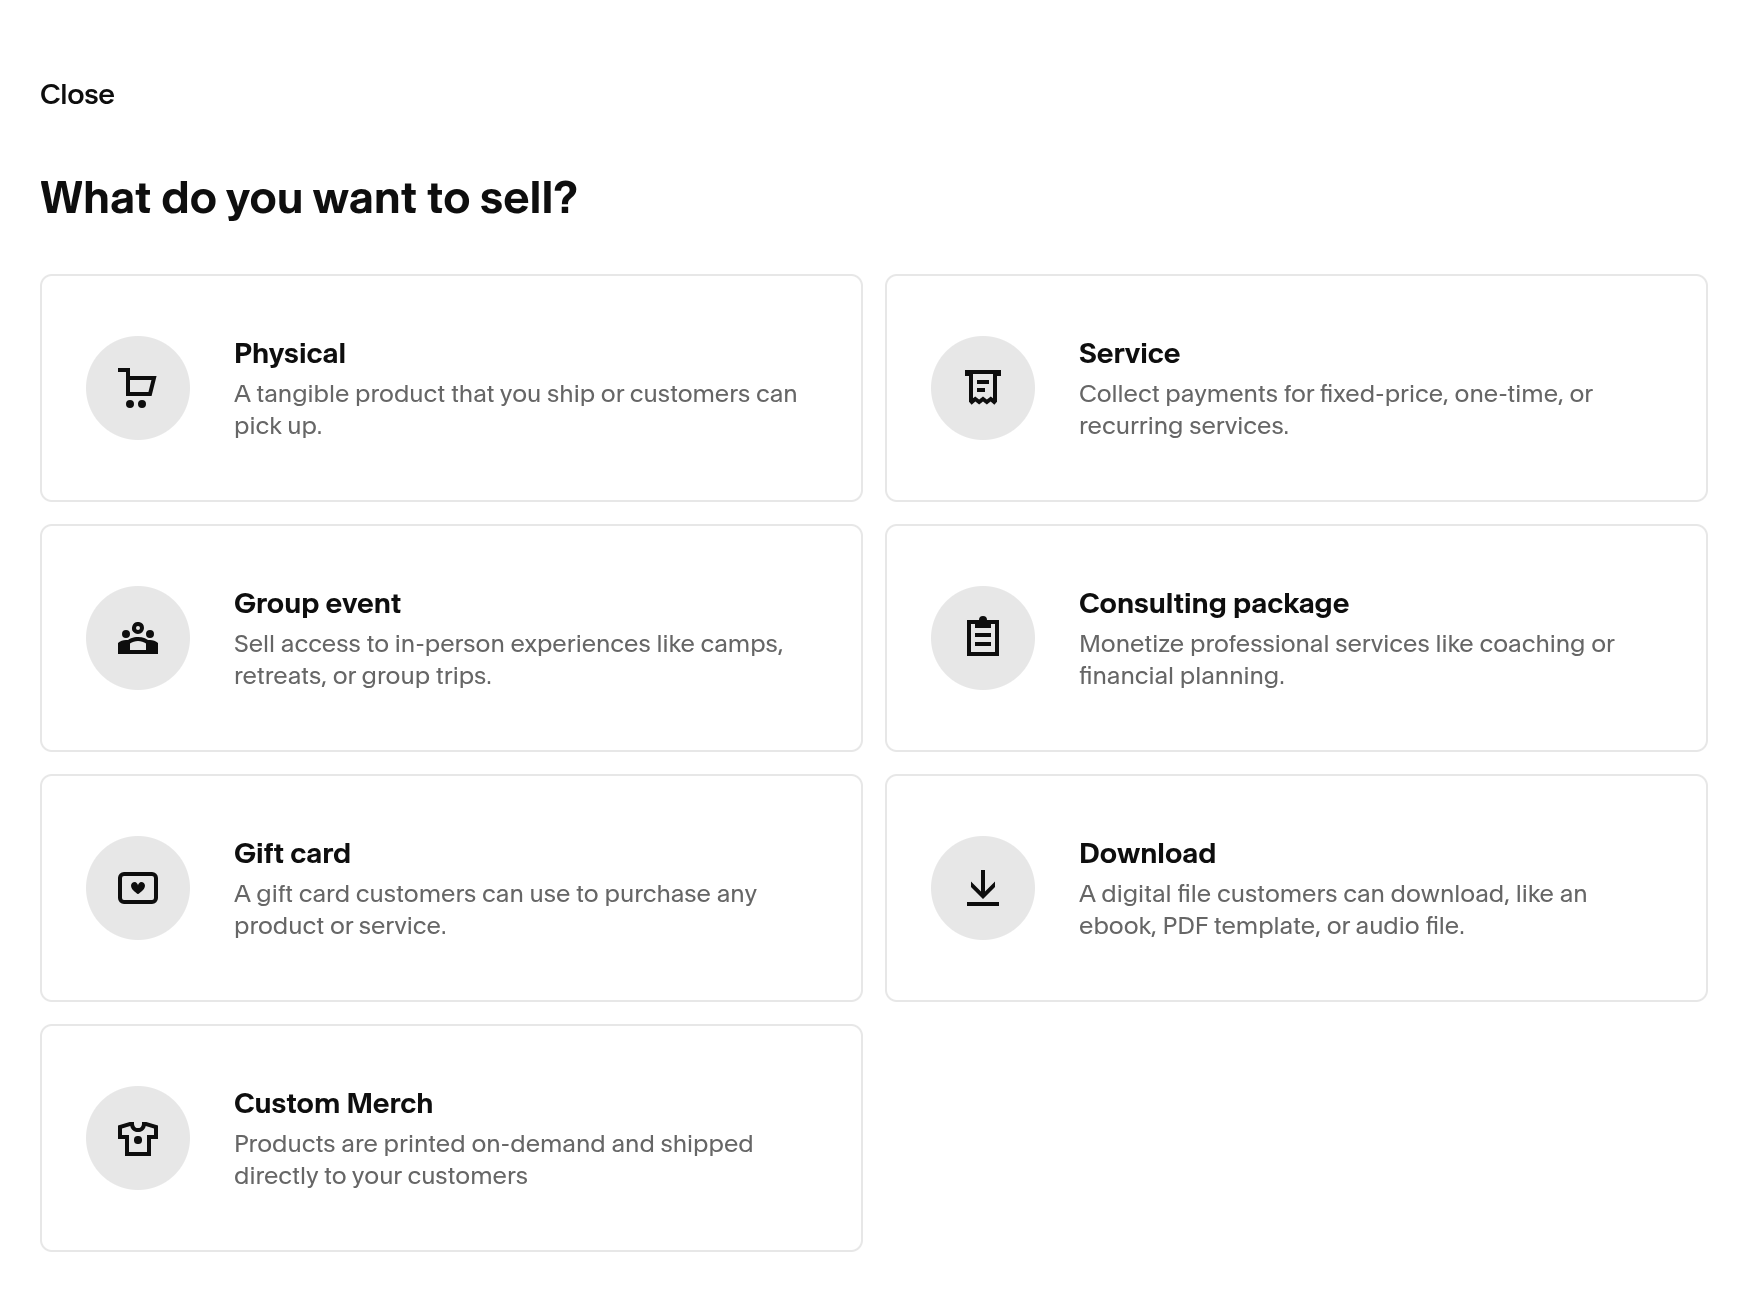
Select the type of product you’d like to upload (physical, services, downloads, or gift card)
It’s important to note that once you’ve selected the type, you cannot change it later. Here is a quick rundown of the main product types.
Physical
For anything you physically ship or deliver to a customer.
Service
For things like consultations, classes, events, or other services that don't require shipping.
Download
For digital products such as ebooks, PDFs, audio files, or other downloadable content.
Gift Card
For digital gift cards that customers can purchase and use toward your products or services.
For this tutorial, we'll focus primarily on physical products, services and downloads, since those are the ones you'll most likely be adding to your website.
Step Two: Add Your Product Name
Once you've selected your product type, you'll be taken into the product editor. The first thing you'll want to add is your product name. This is the name your customers will see throughout your website and during the shopping experience.
This is also the first placement of your keyword.
For example, if you're a wellness coach selling a digital resource, you could use:
Instead of:
The Reset
Try:
The Reset Wellness Journal
Or, if you're selling a service:
Instead of:
1:1 Session
Try:
1:1 Holistic Wellness Coaching Session
You can absolutely give your offers creative names. Just make sure the name or the copy immediately around it tells your customer what the offer actually is.
Step Three: Write Your Product Description
This is where you explain exactly what you're selling.
A strong description should answer:
What is this?
Who is it for?
What's included?
What problem does it solve?
How does it work?
What does the customer receive?
What do they need in order to use it?
What happens after purchase?
For a wellness business, for example, don't simply write:
A 60-minute coaching session to help you feel your best.
Instead, explain what the customer can expect:
A private 60-minute wellness coaching session designed to help you identify what's feeling out of balance and create practical next steps that support your current goals.
DESIGN TIP: Once you’ve published the product, go to the actual page and select edit design. Then add an accordion underneath the listing to explain what the product includes, who the session is for, and what happens after they purchase. You can also add additional images or testimonials to really sell the product.
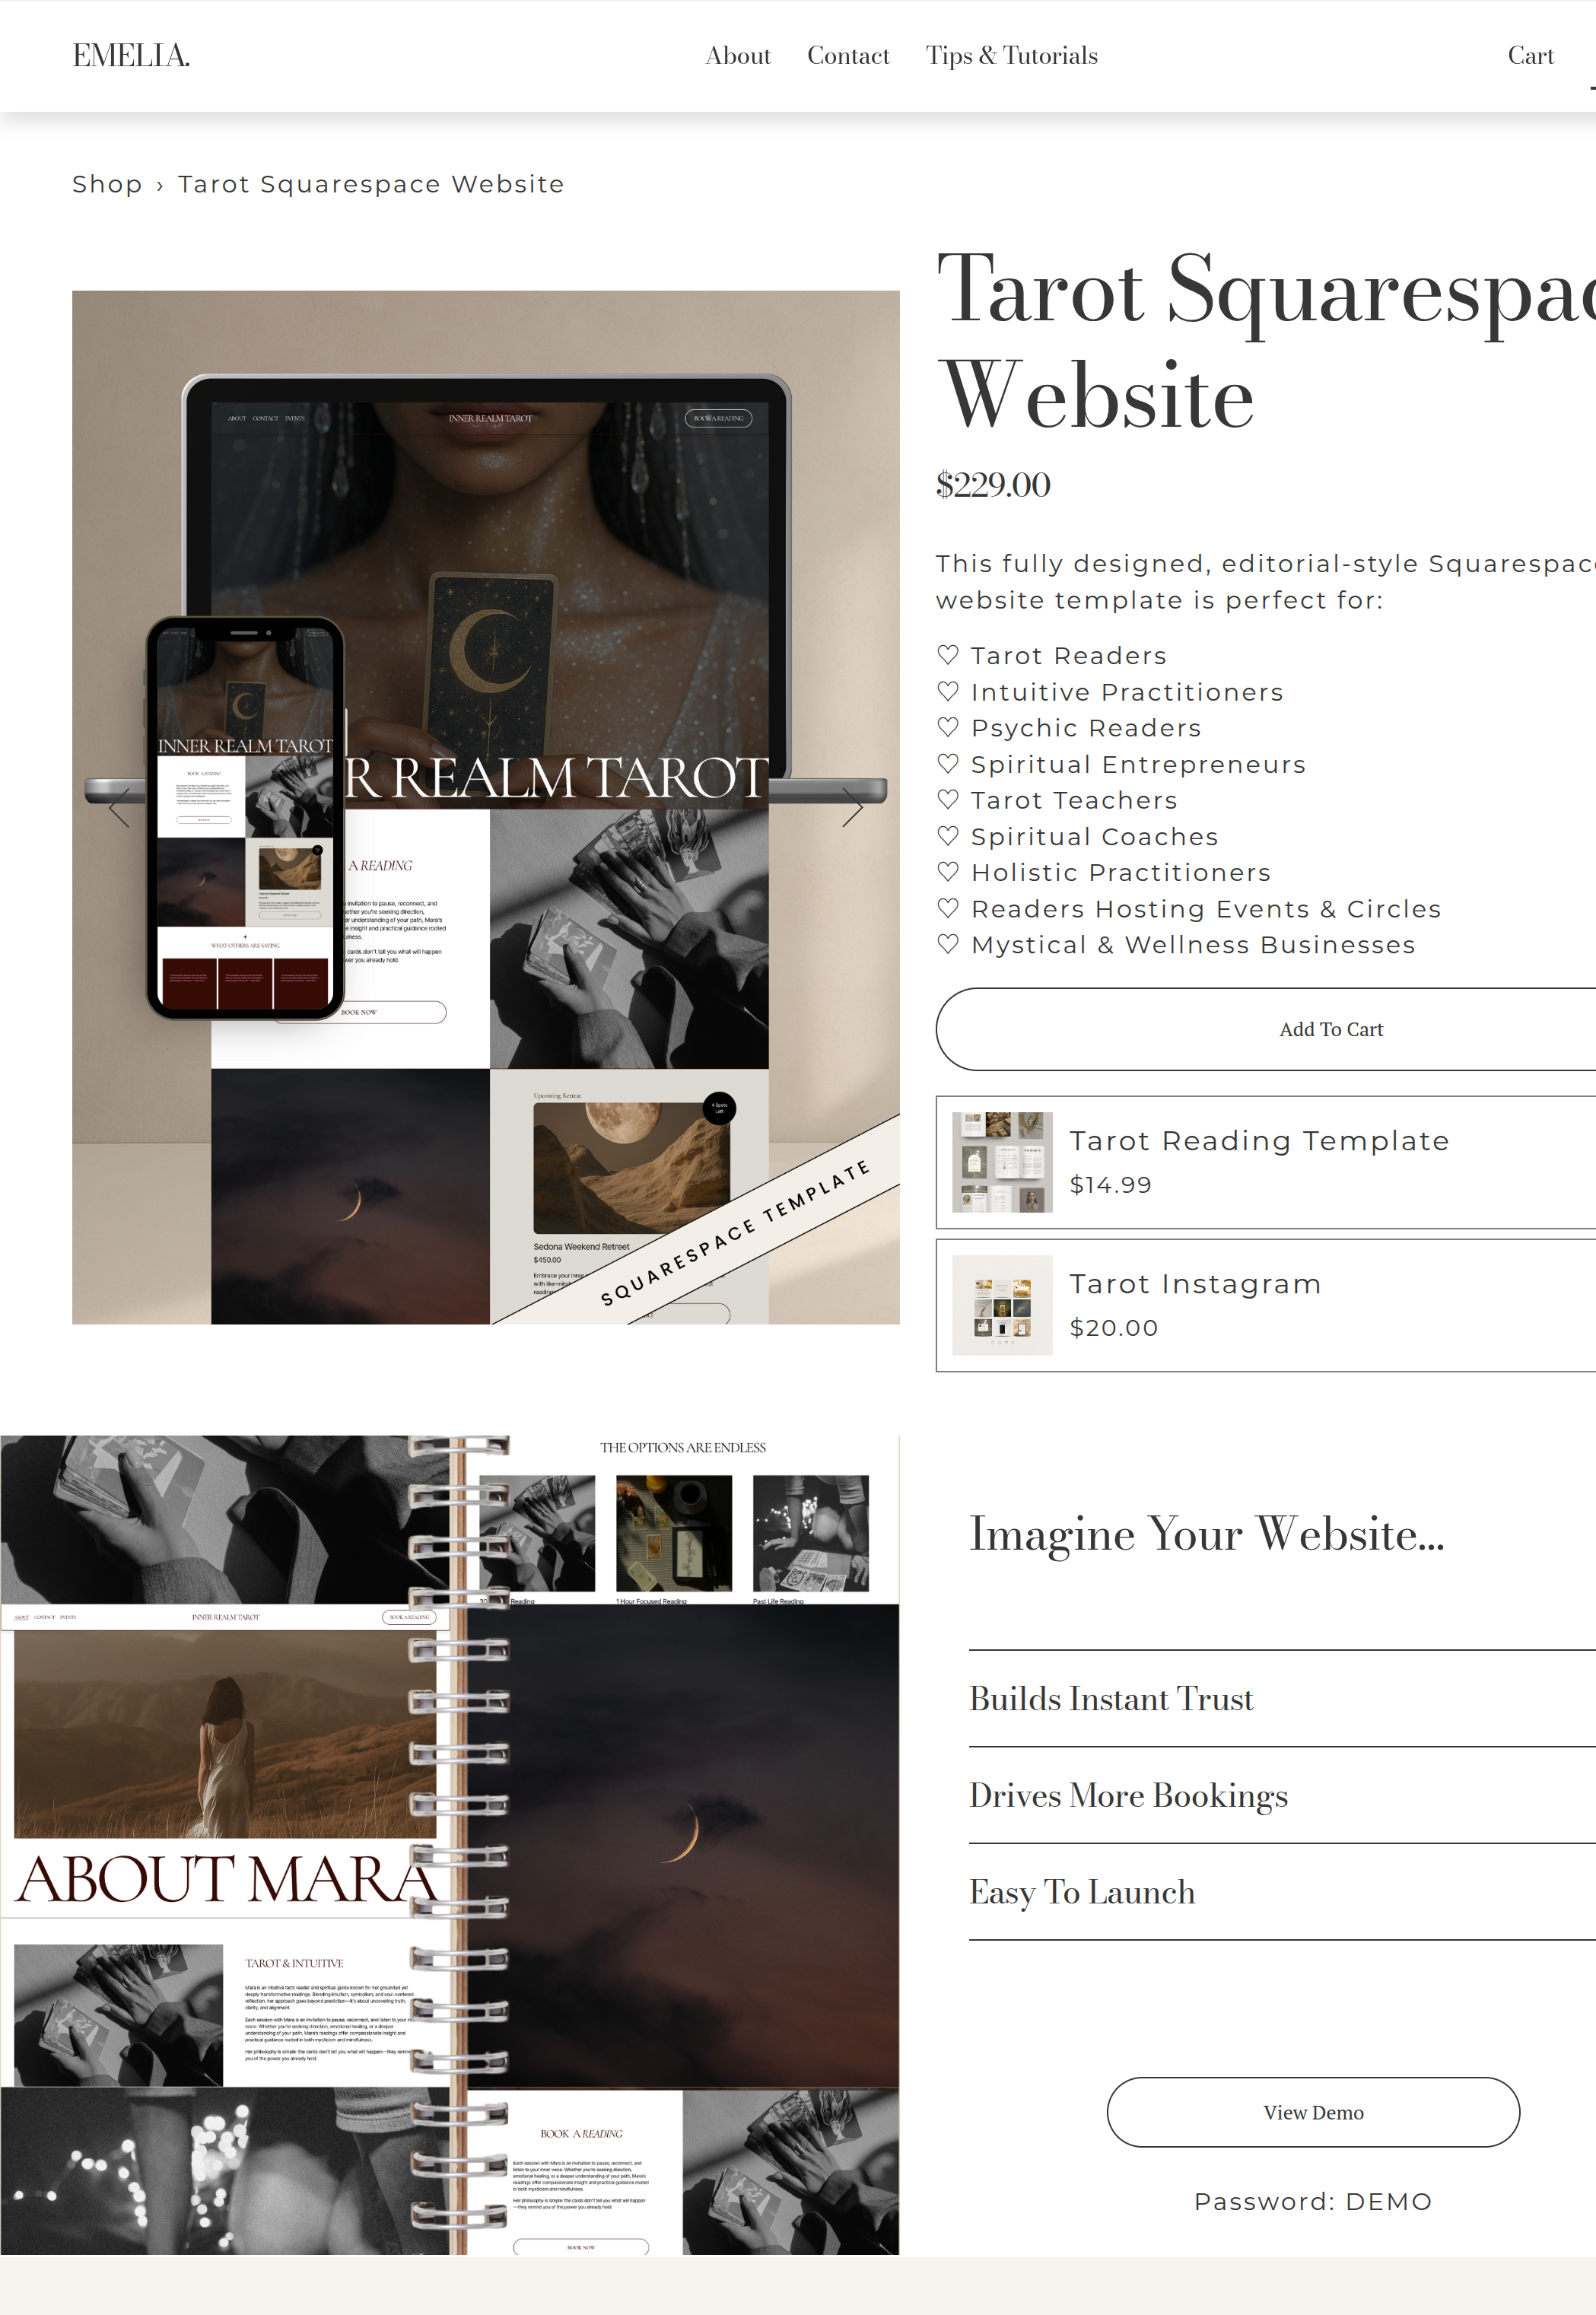
Step Five: Add Your Product Images
Now let's give your product something to look at. Click Add Images and upload your product photography.
You can add multiple images, which is especially helpful for physical products because customers may want to see the product from different angles.
For services, you might use:
A photograph of you
Your studio or workspace
An example of your work
A lifestyle image
A branded graphic
Choose images that represent the experience someone is actually purchasing.
And remember, your product images will appear throughout your website, so this is a great opportunity to make sure your photography feels cohesive with the rest of your brand.
Step Six: Upload Your Digital File
If you're selling a digital product such as an ebook, workbook, guide, template, journal, or PDF, you'll need to upload the file customers will receive after purchasing.
When creating your product, make sure you've selected Download as the product type.
In the product editor, look for the Inventory section. This is where you'll upload the file your customer will receive.
Click Upload File and select the digital file from your computer.
For example, you might upload:
PDF workbooks
Ebooks
Guides
Digital journals
Canva template instruction PDFs
Printable resources
Digital planners
Worksheets
If you're selling a Canva template, for example, you would typically create a PDF containing the Canva template link and your instructions, then upload that PDF as the downloadable file.
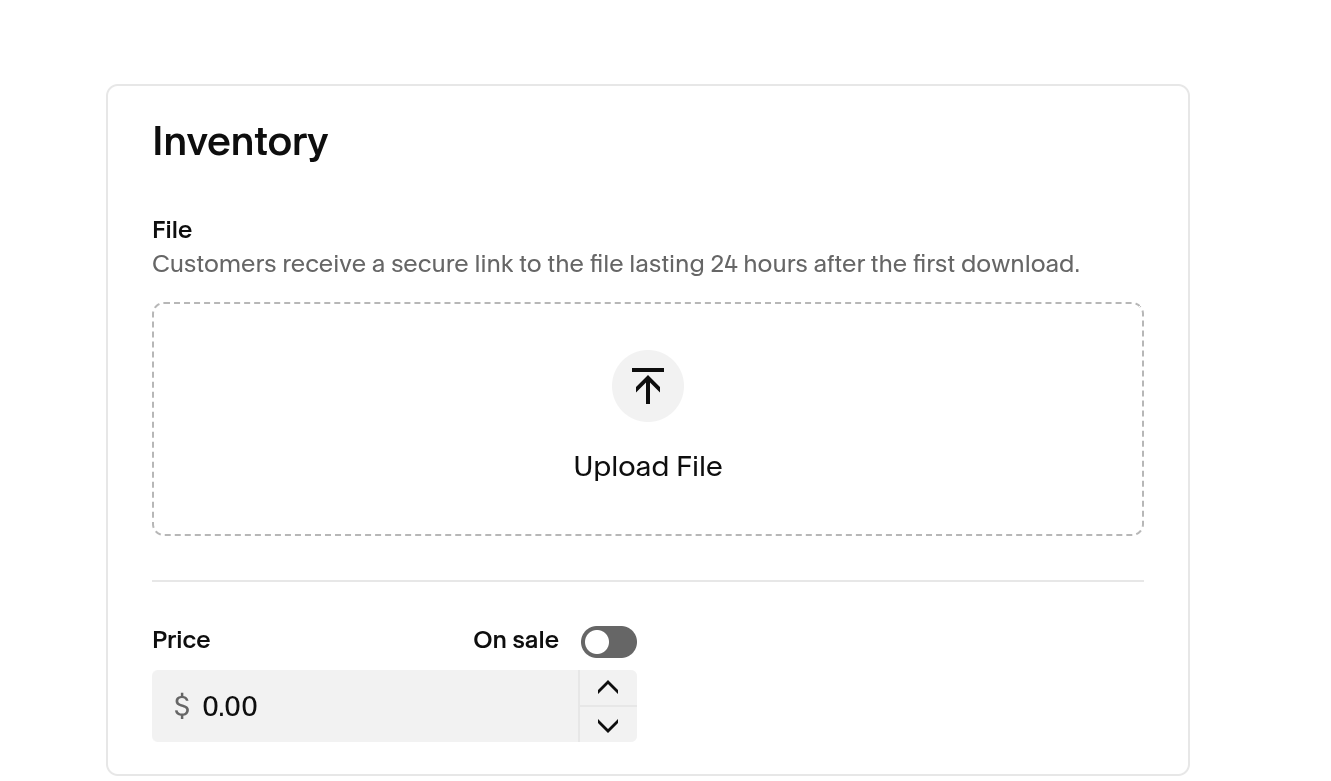
STEP Seven: Set Your Price
Next, you'll add your price. Enter the regular price you'd like to charge for the product or service. If you're offering a sale, Squarespace also gives you the option to add a sale price.
For example:
Regular price: $150
Sale price: $125
A note about setting up a booking service…
If your service requires someone to choose an appointment date and time—like a facial, massage, consultation, or private session—you'll generally want to use Squarespace Scheduling/Acuity rather than treating the service like a standard store purchase.
If you have a service that is subscription based such as coaching, feel free to set that here!
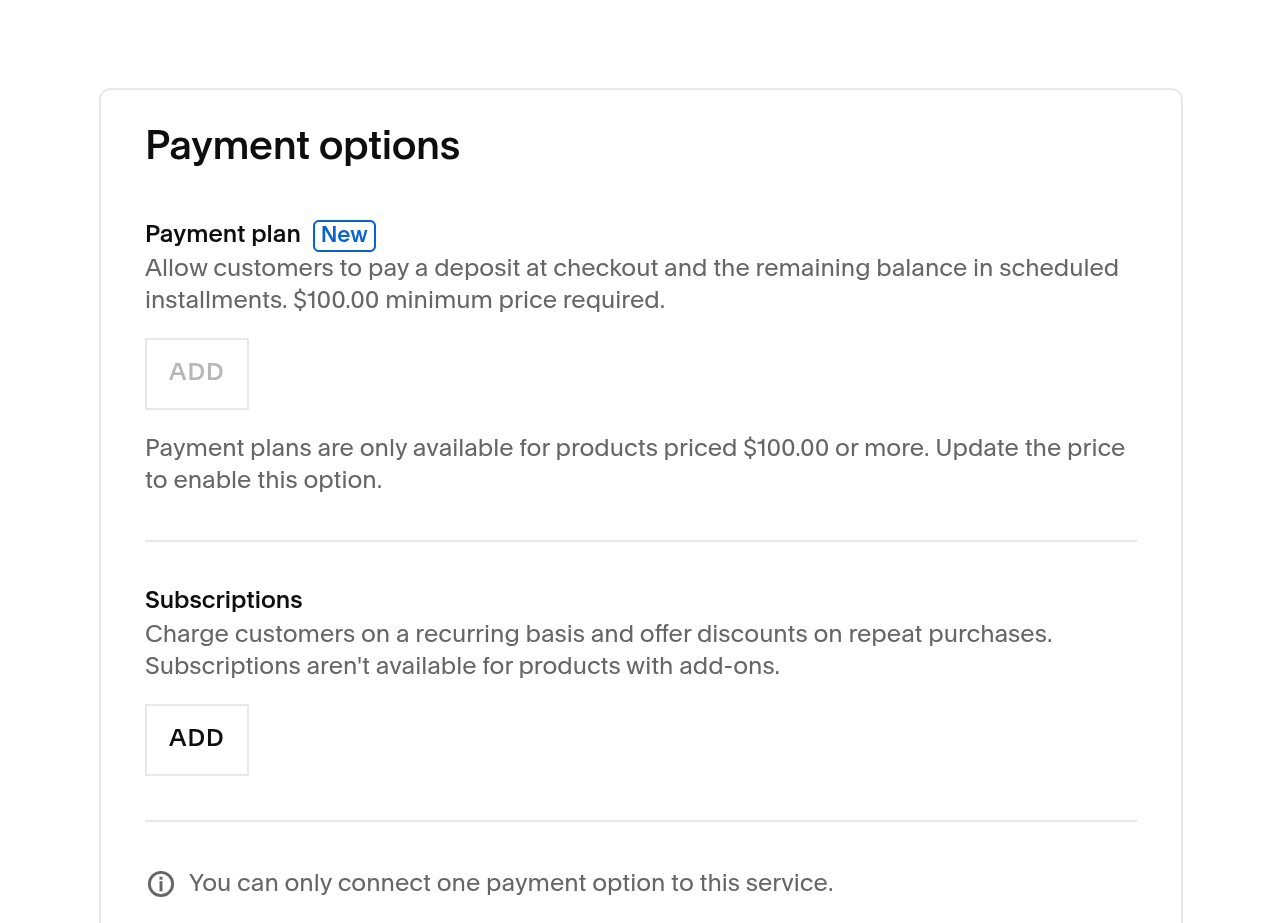
Step Eight: Set Your Inventory
If you're selling a physical product, you'll also need to tell Squarespace how many you have available. Under your inventory settings, you can enter the quantity you currently have available.
For downloads and services it is set to unlimited, but feel free to adjust if needed!
Step Nine: Add Variations
Variants are useful when you're selling different versions of the same product.
For example:
Small / Medium / Large
Black / White / Cream
30 Minutes / 60 Minutes / 90 Minutes
Basic / Premium / Deluxe
Each variant can have its own information, including pricing, SKU, inventory, and—in applicable cases—a specific image.
Step Ten: Add a Customer Form
Squarespace also gives you the ability to collect additional information from customers. This can be especially useful for services or customized products.
For example, you might want to ask:
What date are you interested in?
Do you have any allergies?
What size do you need?
What name should appear on your order?
Do you have any special requests?
You can create an Add to Cart form to collect information before the customer adds the product to their cart. You can also use a custom checkout form for information collected during checkout.
Only ask for information you actually need.
The fewer unnecessary questions someone has to answer, the easier the purchasing experience will be.
Step Eleven: Organize Your Products With Categories
Once you start adding more products, you'll probably want to organize them into categories. Categories make it easier for customers to browse your shop and find what they're looking for. You can have them appear at the top or side of your shop as an additional menu.
For example, a skincare business might have:
Cleansers
Moisturizers
Treatments
Tools
A designer might have:
Website Templates
Canva Templates
Workbooks
Social Media Templates
A wellness business might have:
Private Sessions
Classes
Workshops
Memberships
You can create categories that make sense for your specific business. And if you only have three products, you may not need categories at all.
Step Twelve: Add Product Tags
You can also use tags to help organize your products. Categories are generally more useful for creating visible groupings for customers, while tags can be helpful for internal organization and filtering.
For example, you might tag products as:
Best Seller
New
Digital
Beginner
Seasonal
You don't need to go crazy with tags. Use them when they actually make your products easier to organize or manage.
Step Thirteen: Add Your Product URL
Squarespace will automatically create a URL for your product, but you can customize the URL slug if you'd like.
For example, instead of:
/product-12345
you might want something more SEO friendly like:
/signature-facial
Keep your URLs simple and easy to understand, helps boost your SEO, and it makes sharing a direct link simplier.
Step Fourteen: Review Your Product Details
Before publishing, take a moment to go back through everything you've added.
Check your:
Product name
Description
Images
Price
Inventory
Variants
Categories
Tags
Customer forms
Product URL
This is also a good time to check your spelling and make sure your product information actually reflects what someone is purchasing.
Step Fifteen: Save & Publish
Once everything looks good, save your product.
You'll have the option to Publish the product so it becomes visible and available for purchase on your store. You can also save products without immediately publishing them.
This is especially useful if you're building your shop ahead of a launch.
You can create everything in advance, keep products hidden, and publish them when you're ready.
Squarespace also allows you to schedule a product to publish at a specific date and time, which can be useful if you're planning a product launch.
Step Sixteen: See How It Looks on Your Website
Once your product is published, head back over to your Shop page.
You'll now see your product displayed within your store.
Your store page acts as the browsable collection of your products, while each product also has its own product details page where customers can see more information and purchase the item.
Click into your product and look at it from the perspective of a customer.
DUPLICATING A PRODUCT
If you're creating several similar products, Squarespace also allows you to duplicate a product. This can be a huge time saver. Just make sure you carefully review the duplicated product before publishing it so you don't accidentally leave information from the original product behind. Squarespace currently allows physical and service products to be duplicated.
DELETING A PRODUCT
If you decide you no longer want to sell something, you can delete the individual product from your Products panel. If you're unsure whether you'll want the product again later, you may want to keep it hidden rather than permanently deleting it.
A QUICK NOTE ABOUT SERVICES
If you're selling services that customers purchase directly through your website—such as a class, workshop, event, or another service that doesn't require appointment scheduling—Service products are a great option.
Service products don't require shipping information because there is nothing being physically shipped to the customer.
However, if you're offering something where the customer needs to choose a specific date and time to meet with you, that's where Acuity Scheduling becomes the better option.
We'll cover that in much more detail in the next tutorial.
YOU'RE ALL SET!
And that's how you add products and services to your Squarespace website!
Once you've created your products, Squarespace will handle displaying them throughout your Shop page, product pages, and any Product Blocks you've added elsewhere on your website.
Take your time with your product photography, descriptions, pricing, and organization. These little details make a huge difference in how someone experiences your shop.
And the best part? You can always come back and edit your products later. Add something new, update an old listing, change your pricing, feature a new best seller, or reorganize your categories as your business grows.
Your shop doesn't have to be perfect on day one. It just needs to be ready for your first customer.
