How To Edit Your Site Header In Squarespace
Your site header is one of the first things someone sees when they land on your website, so it's worth taking a little time to make sure it feels like your brand and functions the way you want it to.
Your header is typically where you'll find your logo, navigation, and any buttons or other elements you want visitors to have easy access to.
In this tutorial, we'll walk through how to customize your header, from changing your logo and navigation to adjusting the layout, colors, and mobile view.
Step One: Locate Your Site Header
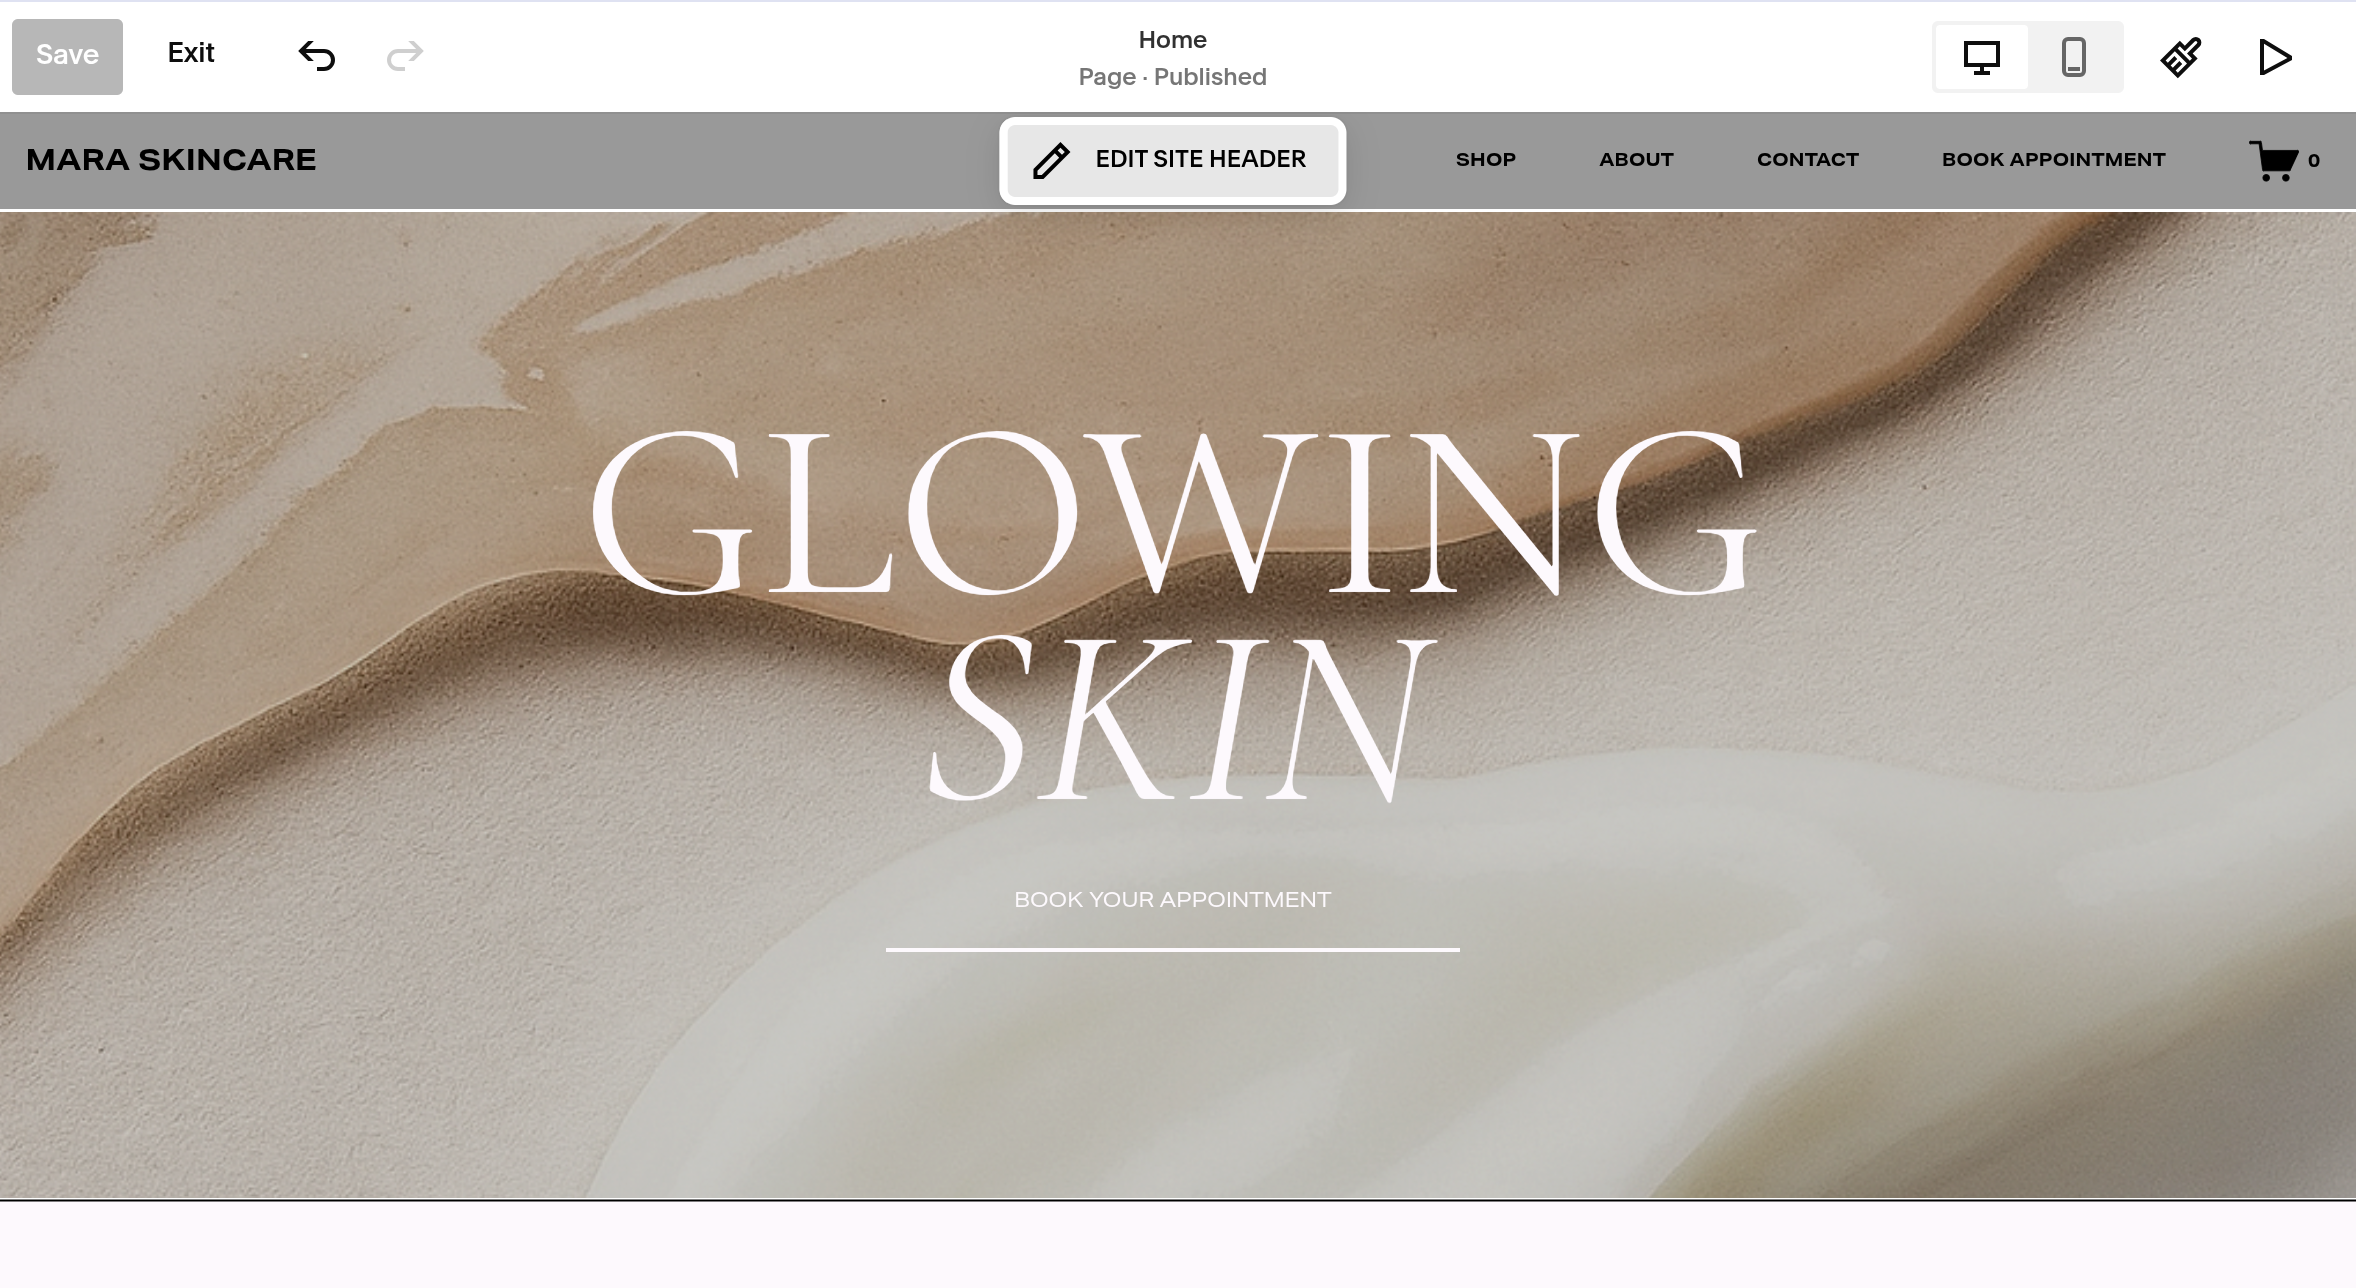
To begin, open the page editor for your website. Once you're inside the editor, hover your mouse over the very top of the page until you see the Edit Site Header option.
Click it, and you'll see the header editor appear. The nice thing about the site header is that you only need to edit it once for the changes to appear throughout your website.
Step Two: Understanding The Header Features
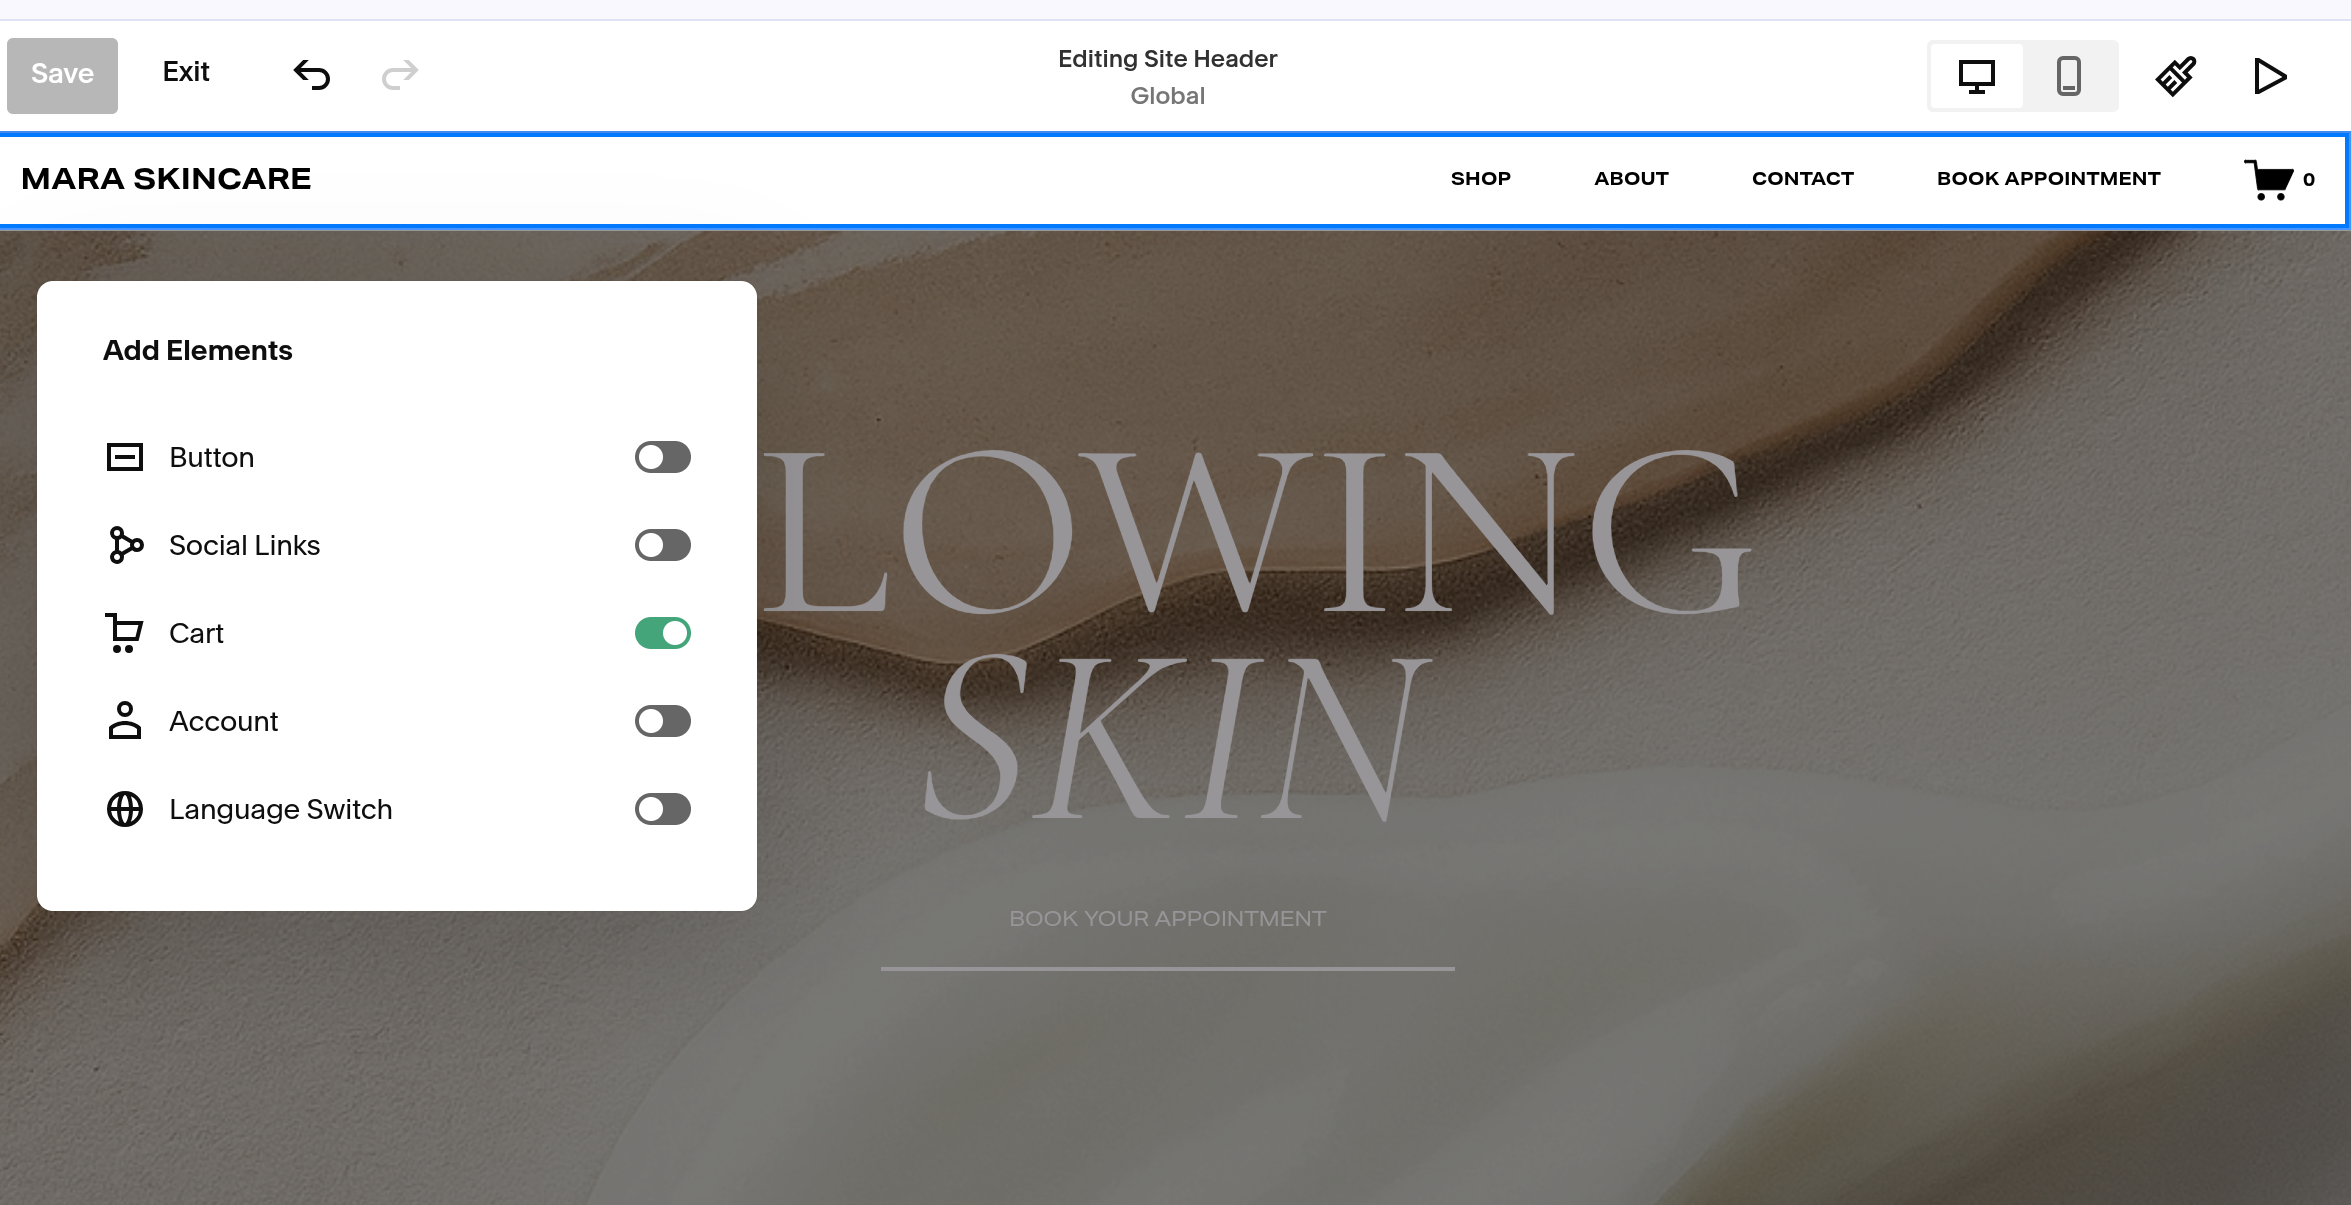
Once you've opened the Site Header editor, you'll see the different elements that make up your header.
Depending on your template, you may see slightly different options, but most headers will include some combination of:
Logo or Site Title
Navigation
Buttons
Social Icons
Mobile Menu (switching to mobile view)
Think of your header as the little navigation hub for your website. Its job is to help visitors quickly understand whose website they're on, where they can go, and—if you've included a button—what you'd most like them to do next.
You don't need to fill your header with every possible option Squarespace gives you. In fact, the simpler, the better most of the time.
Step Three: Add Your Logo
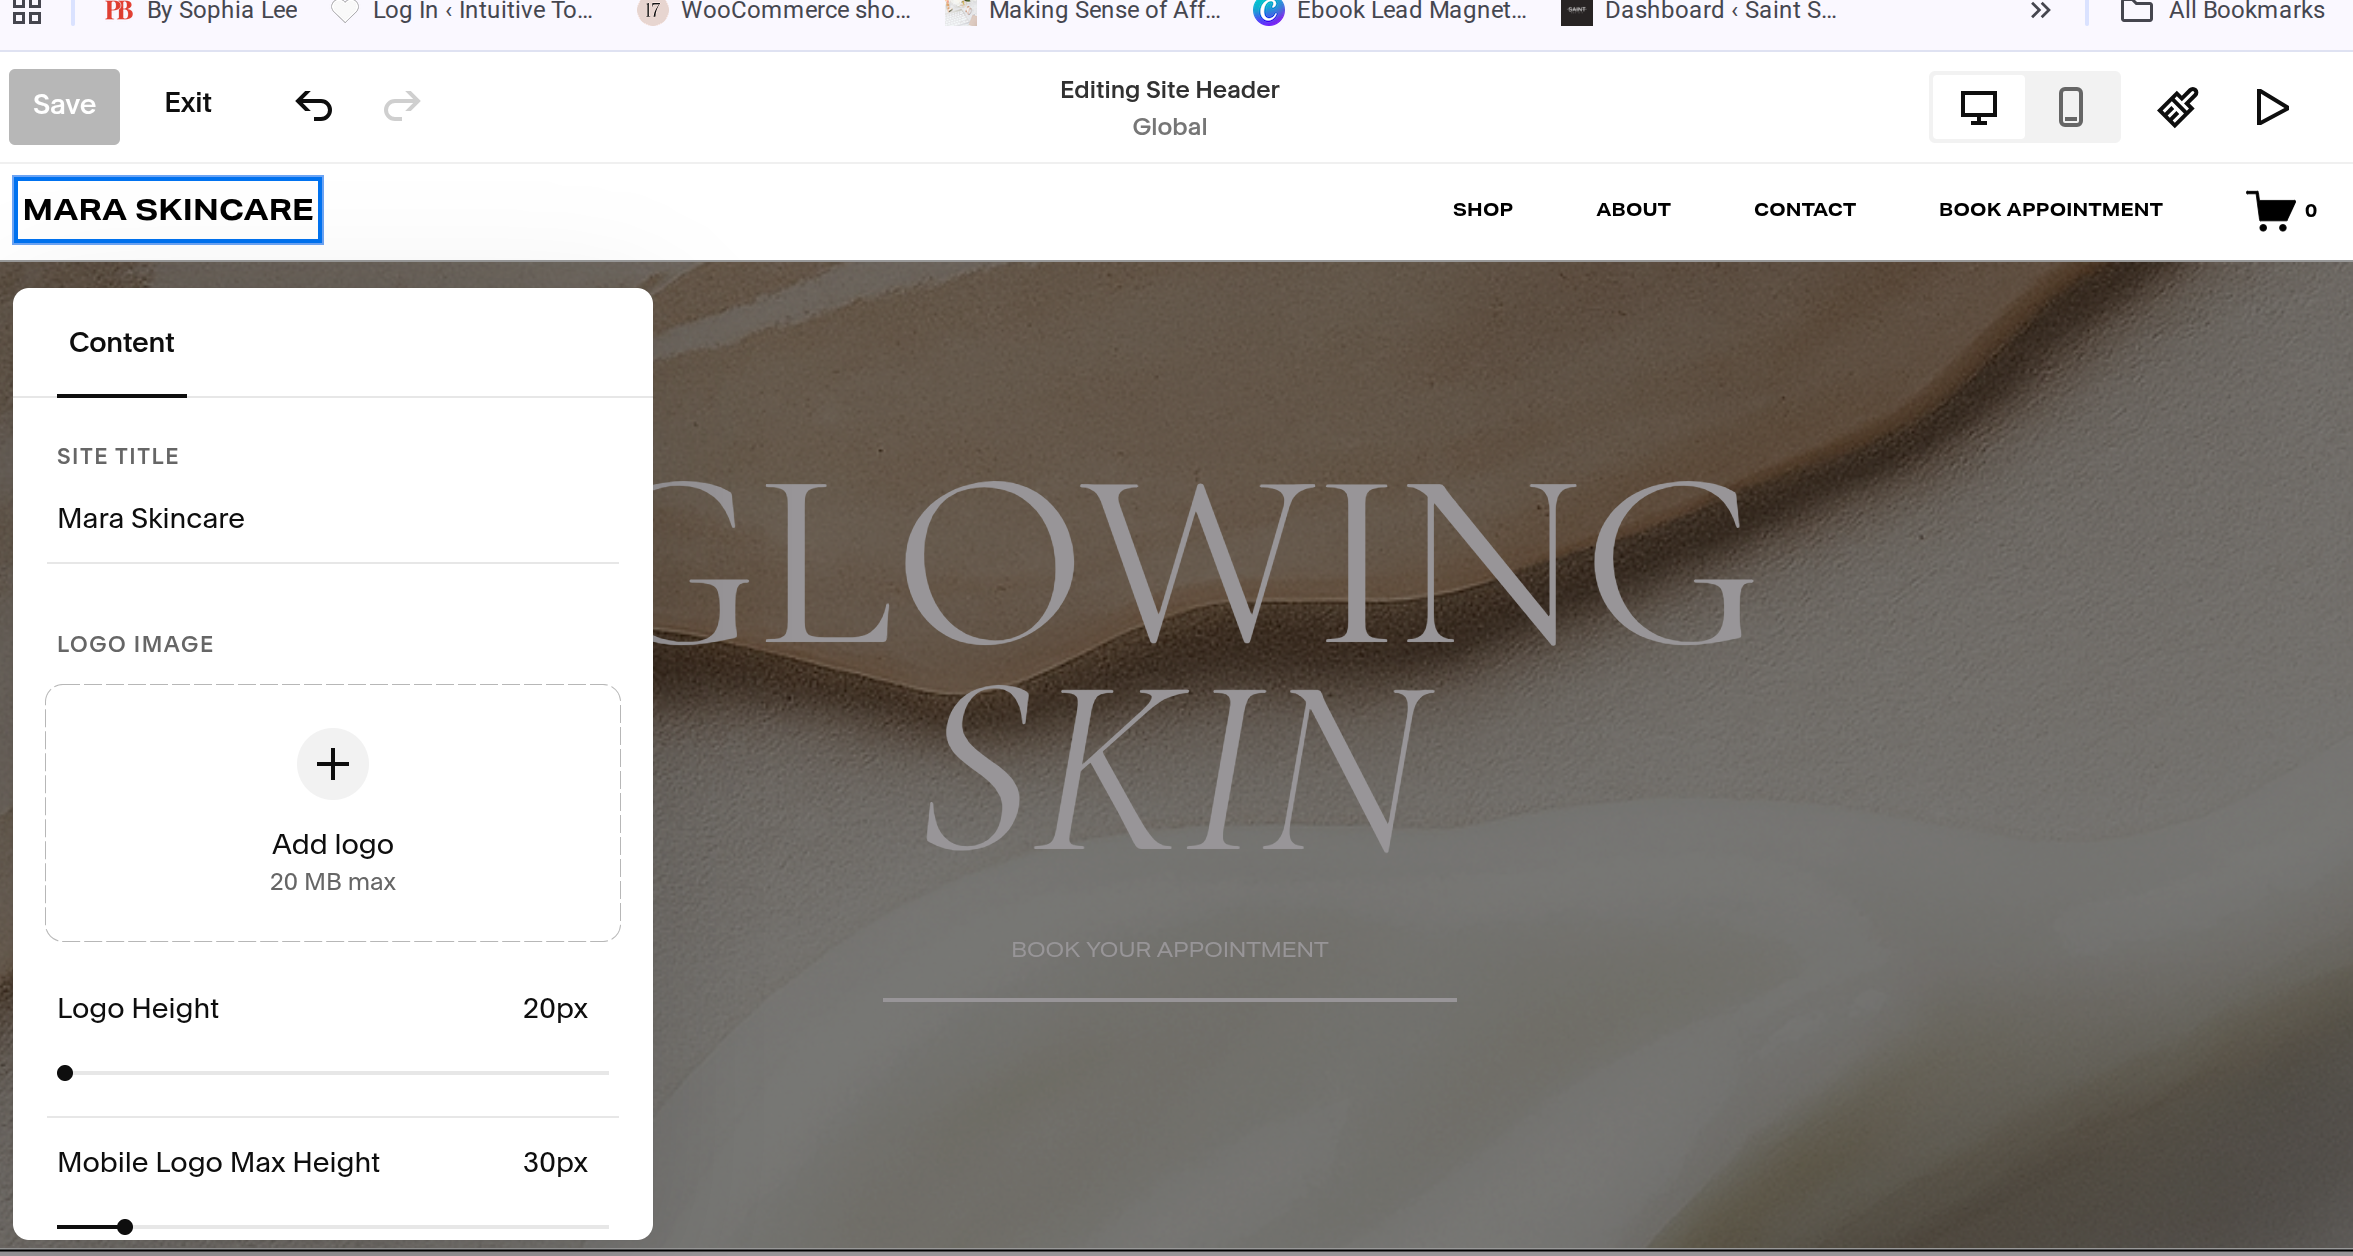
Let's start with one of the most important pieces of your header: your logo.
If you're uploading a new logo, select the option to upload your image and choose the logo file from your computer. The suggested sizing for your logo is 500px to 1000px wide. Otherwise, you can add your brand name in where the text Logo appears.
Once it's uploaded, you'll be able to adjust the size of your logo within the header.
If you would like to move the Logo, press the EDIT DESIGN — and select the layout you desire!
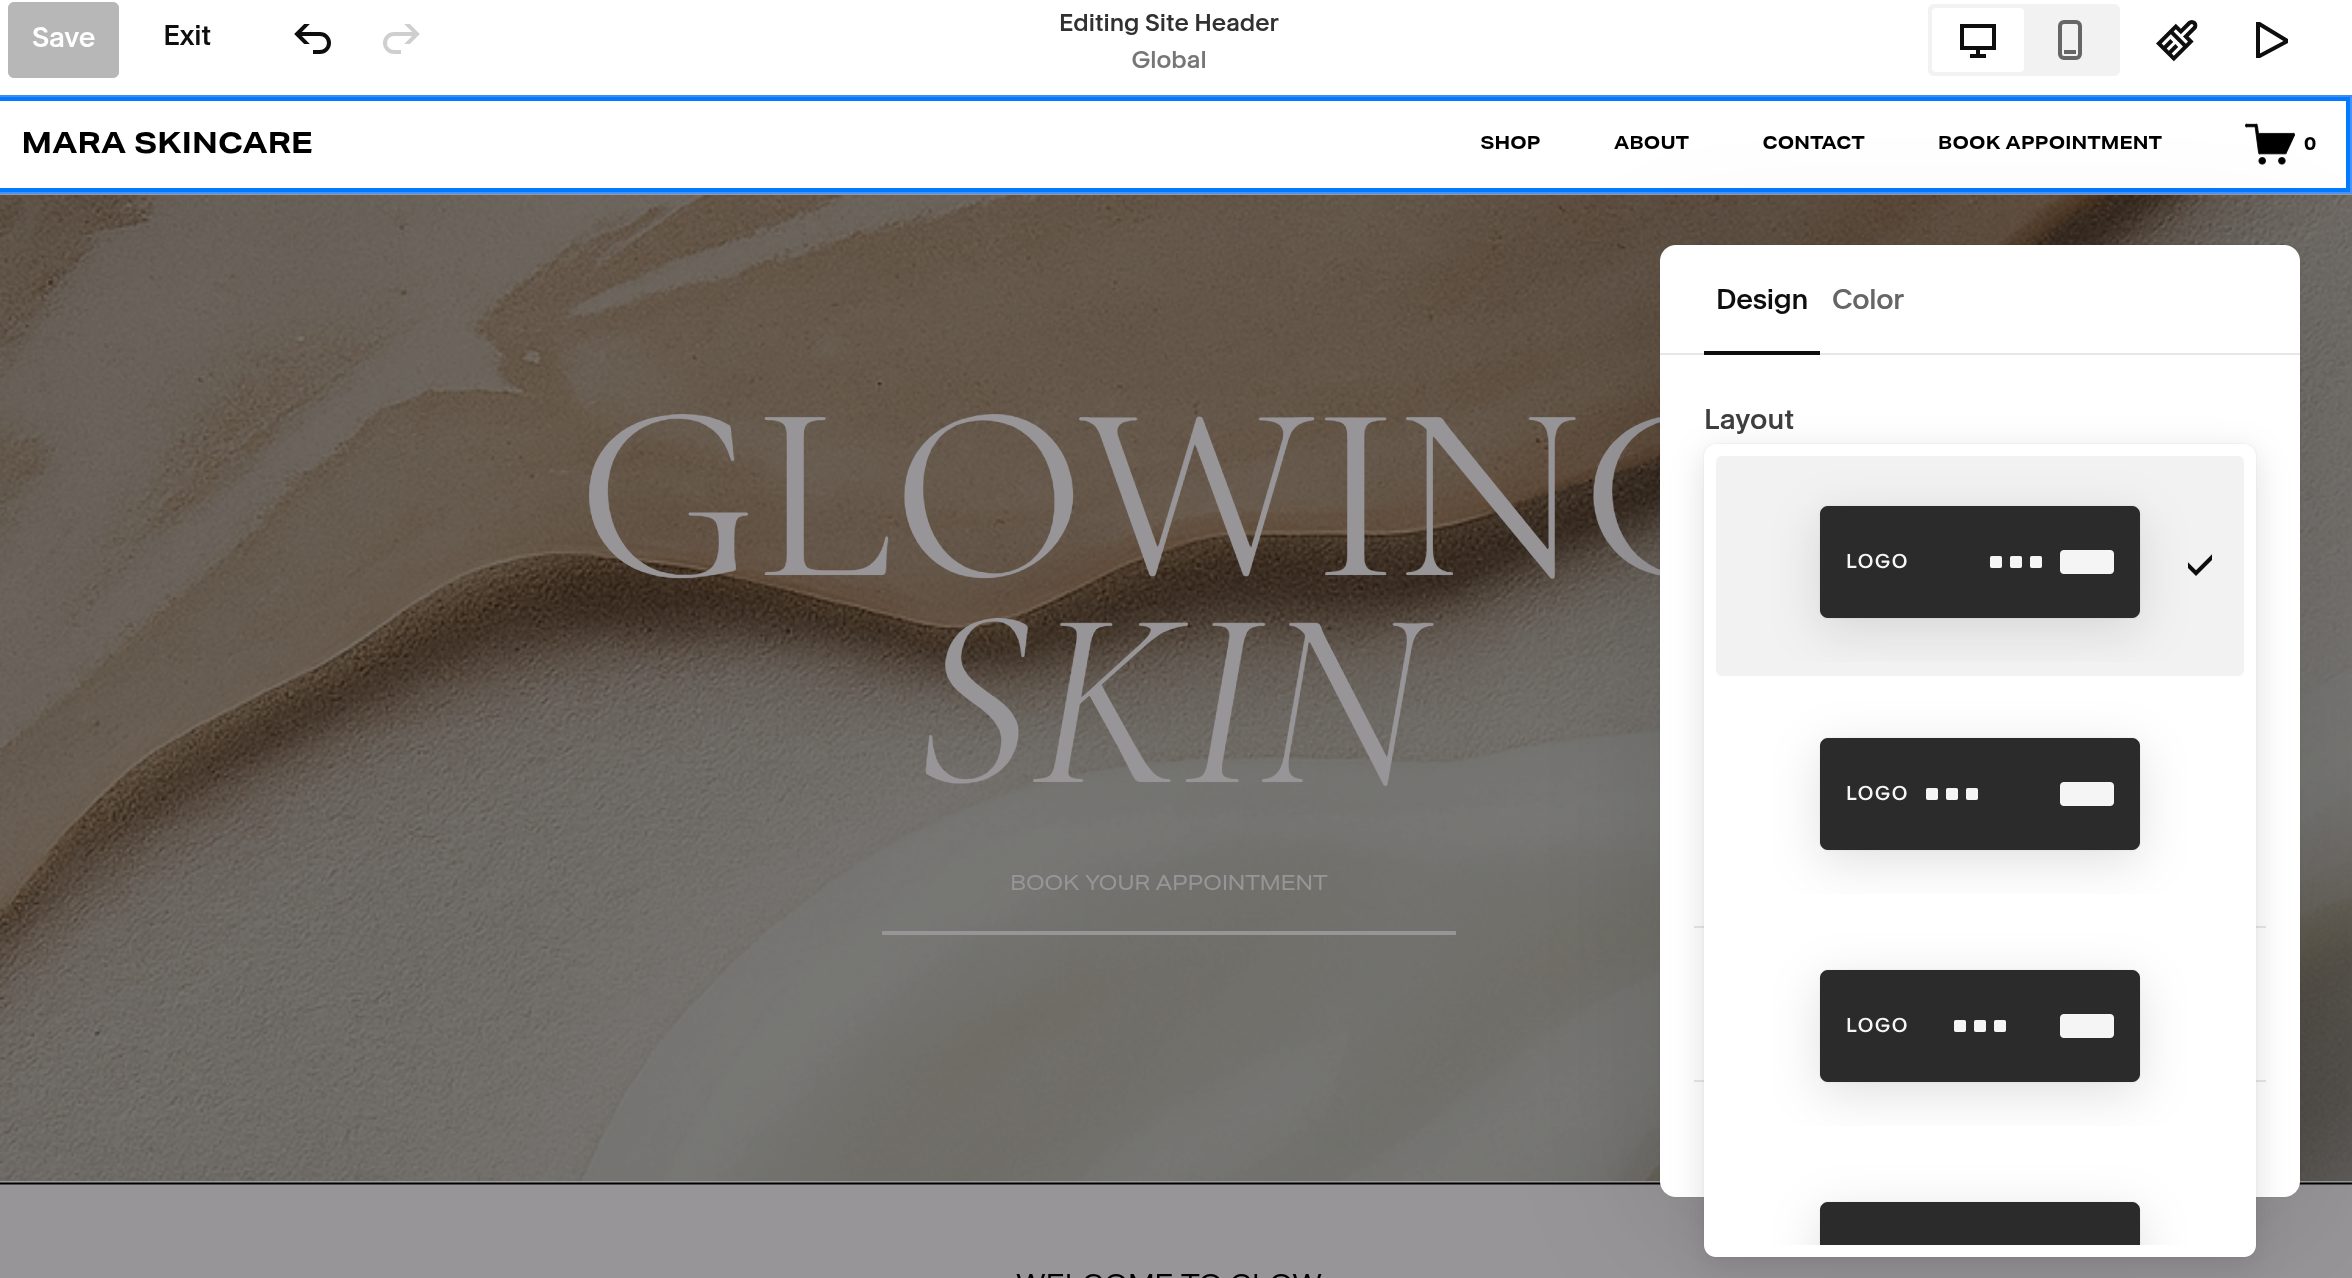
Step Four: Customize Your Navigation Menu
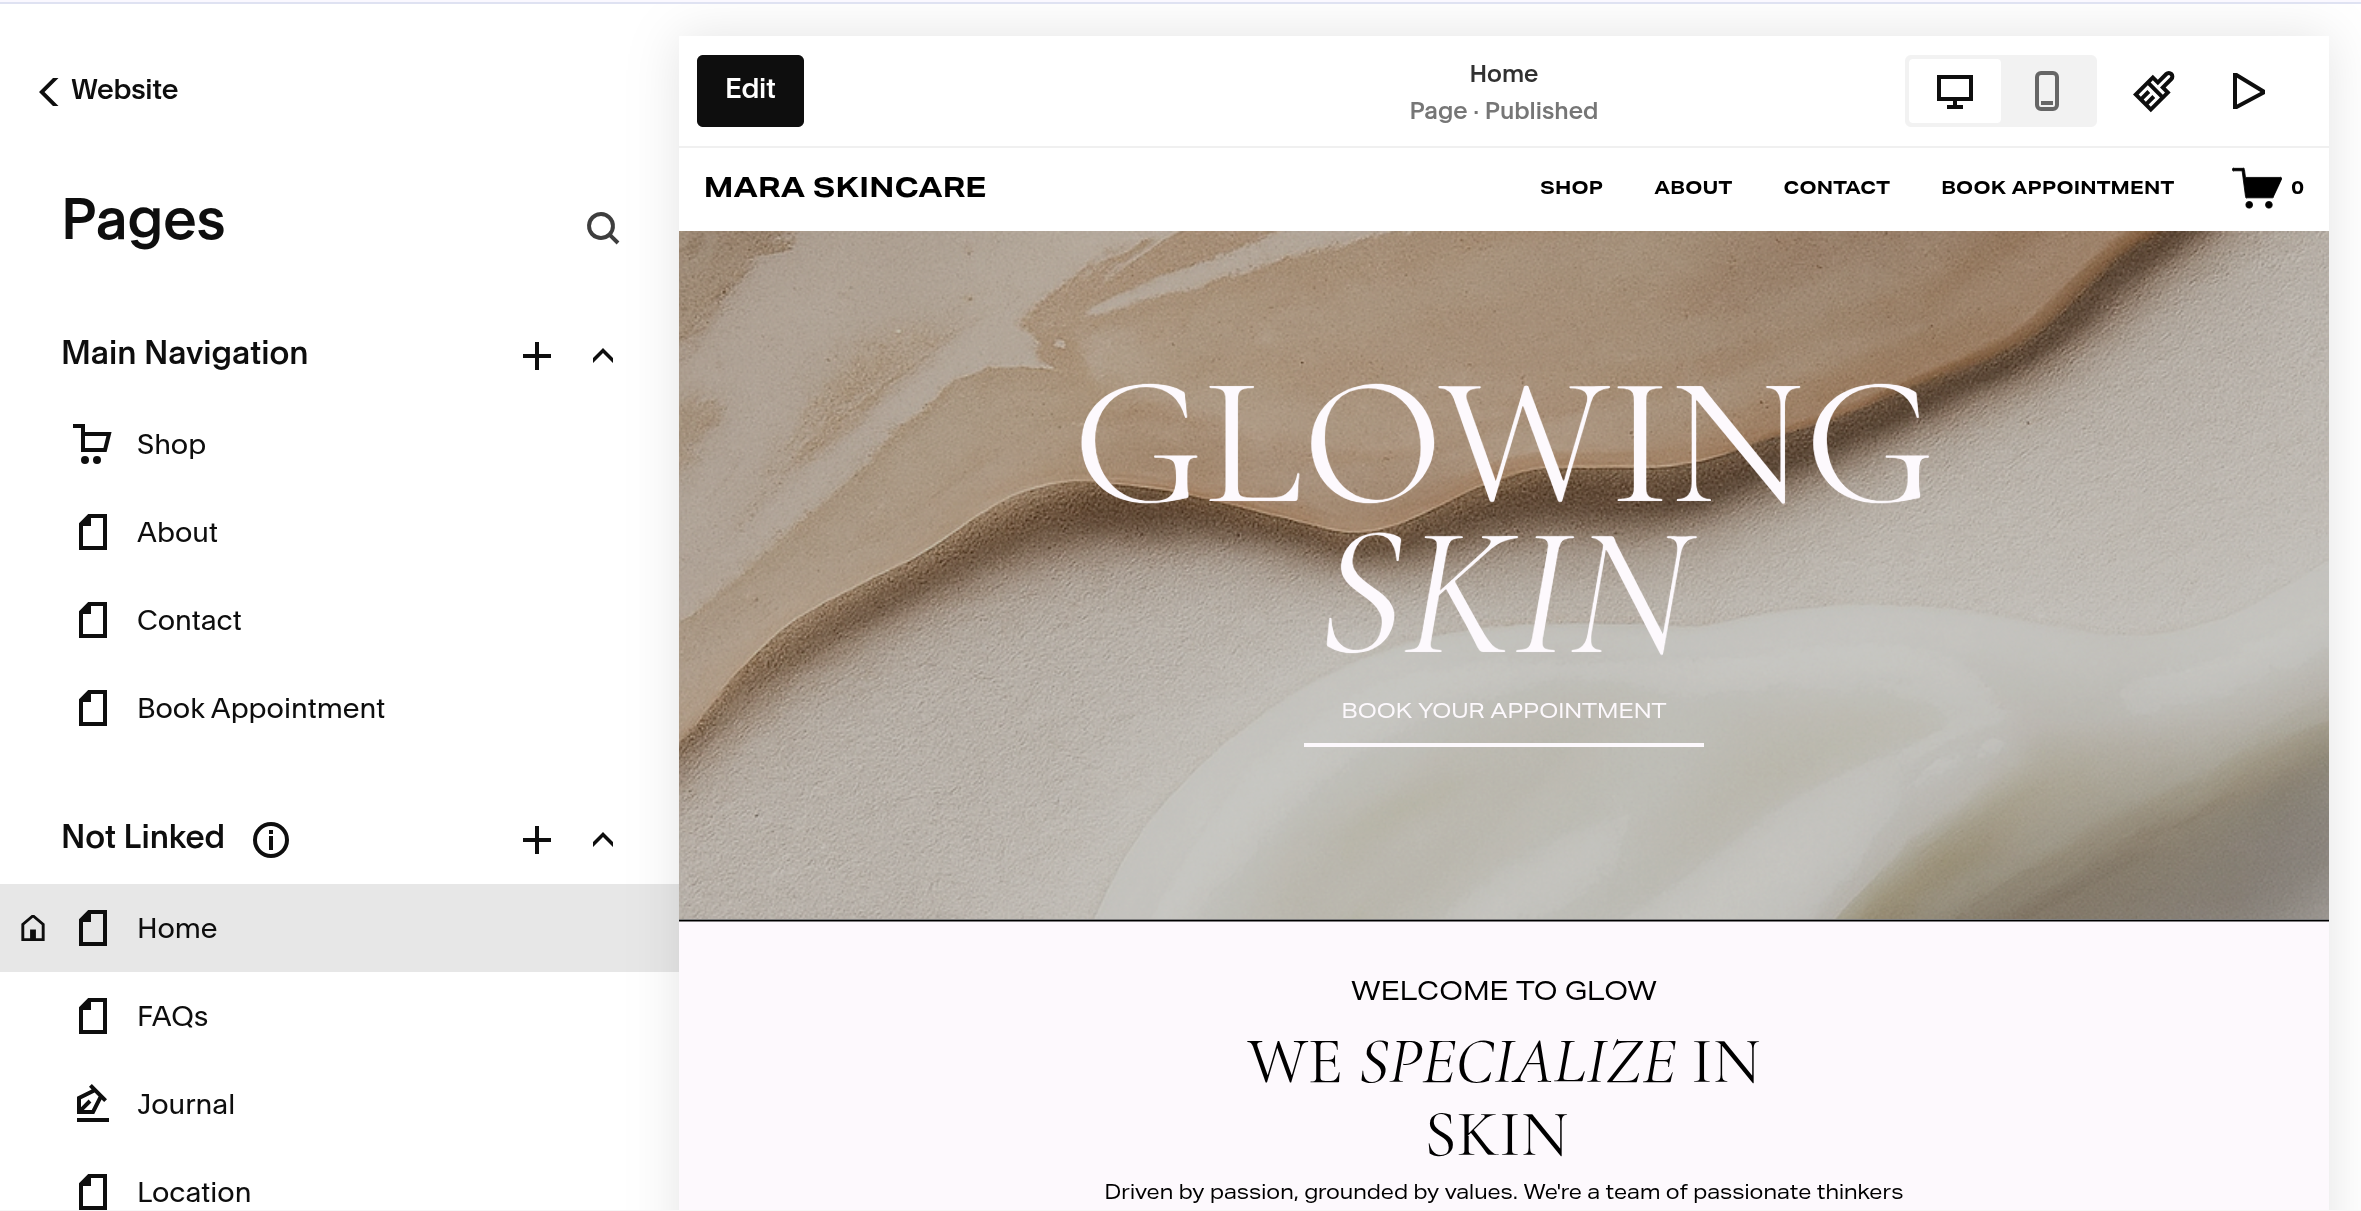
Your navigation is the collection of links visitors use to move around your website.
This might include pages like:
About
Services
Portfolio
Blog
Contact
Your navigation is controlled by the pages you've added to your site's navigation area, so if you need to remove, reorder, or add a page—you'll typically do that from your Pages panel.
If you want to add a drop down menu — in the pages panel press the + sign. from there scroll to the bottom to find drop link, add what pages you would like to see under that drop down below. Once finalized, add that to the main navigation menu.
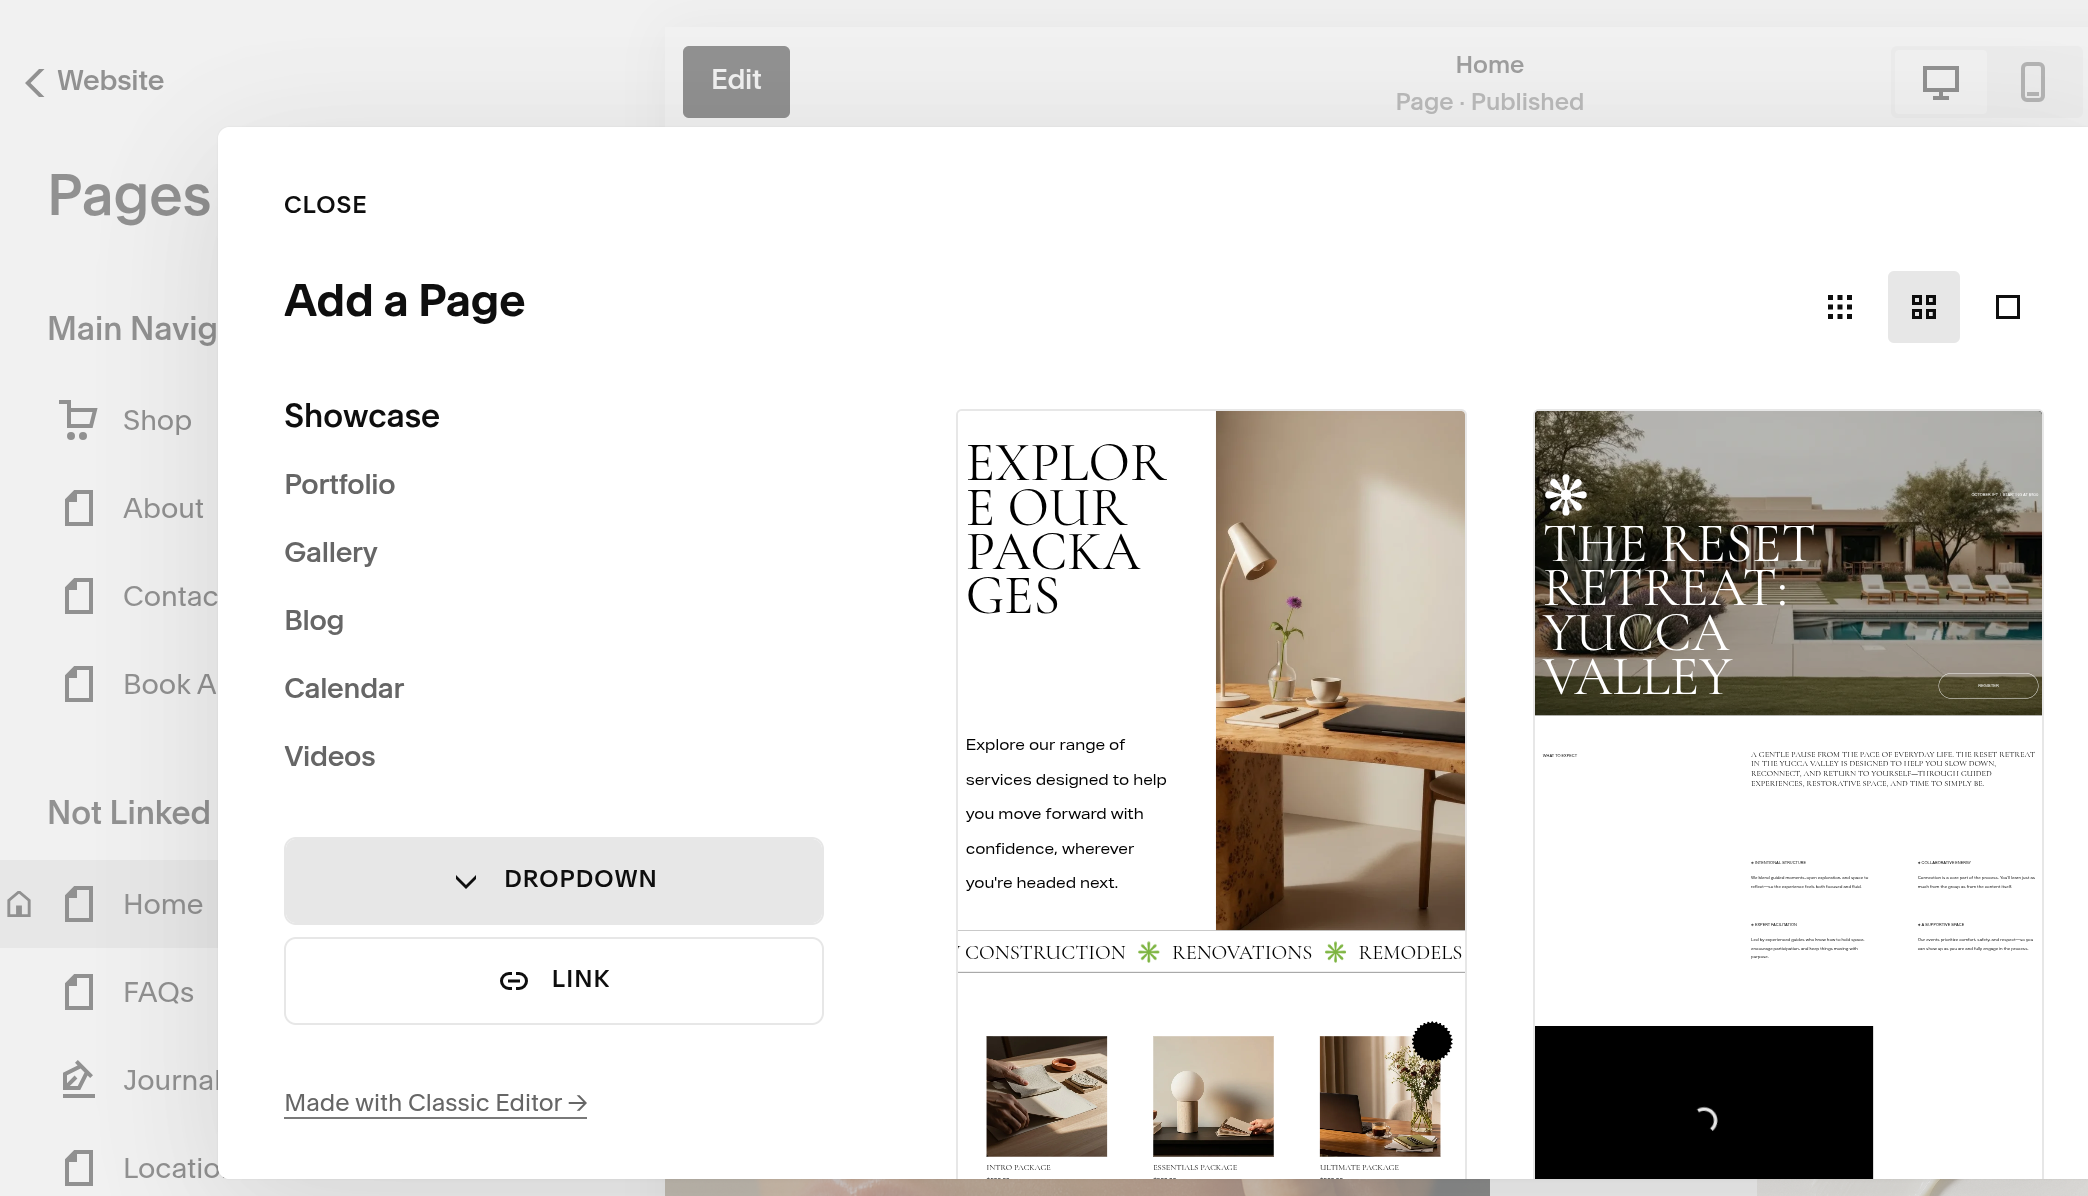
You don't need to put every page on your website in your main navigation. Your navigation should help someone quickly understand the most important places they can go. If you have a lot of pages, consider organizing some of them into a dropdown menu rather than having a long row of links across the top of your website.
Step Five: Add a Header Button
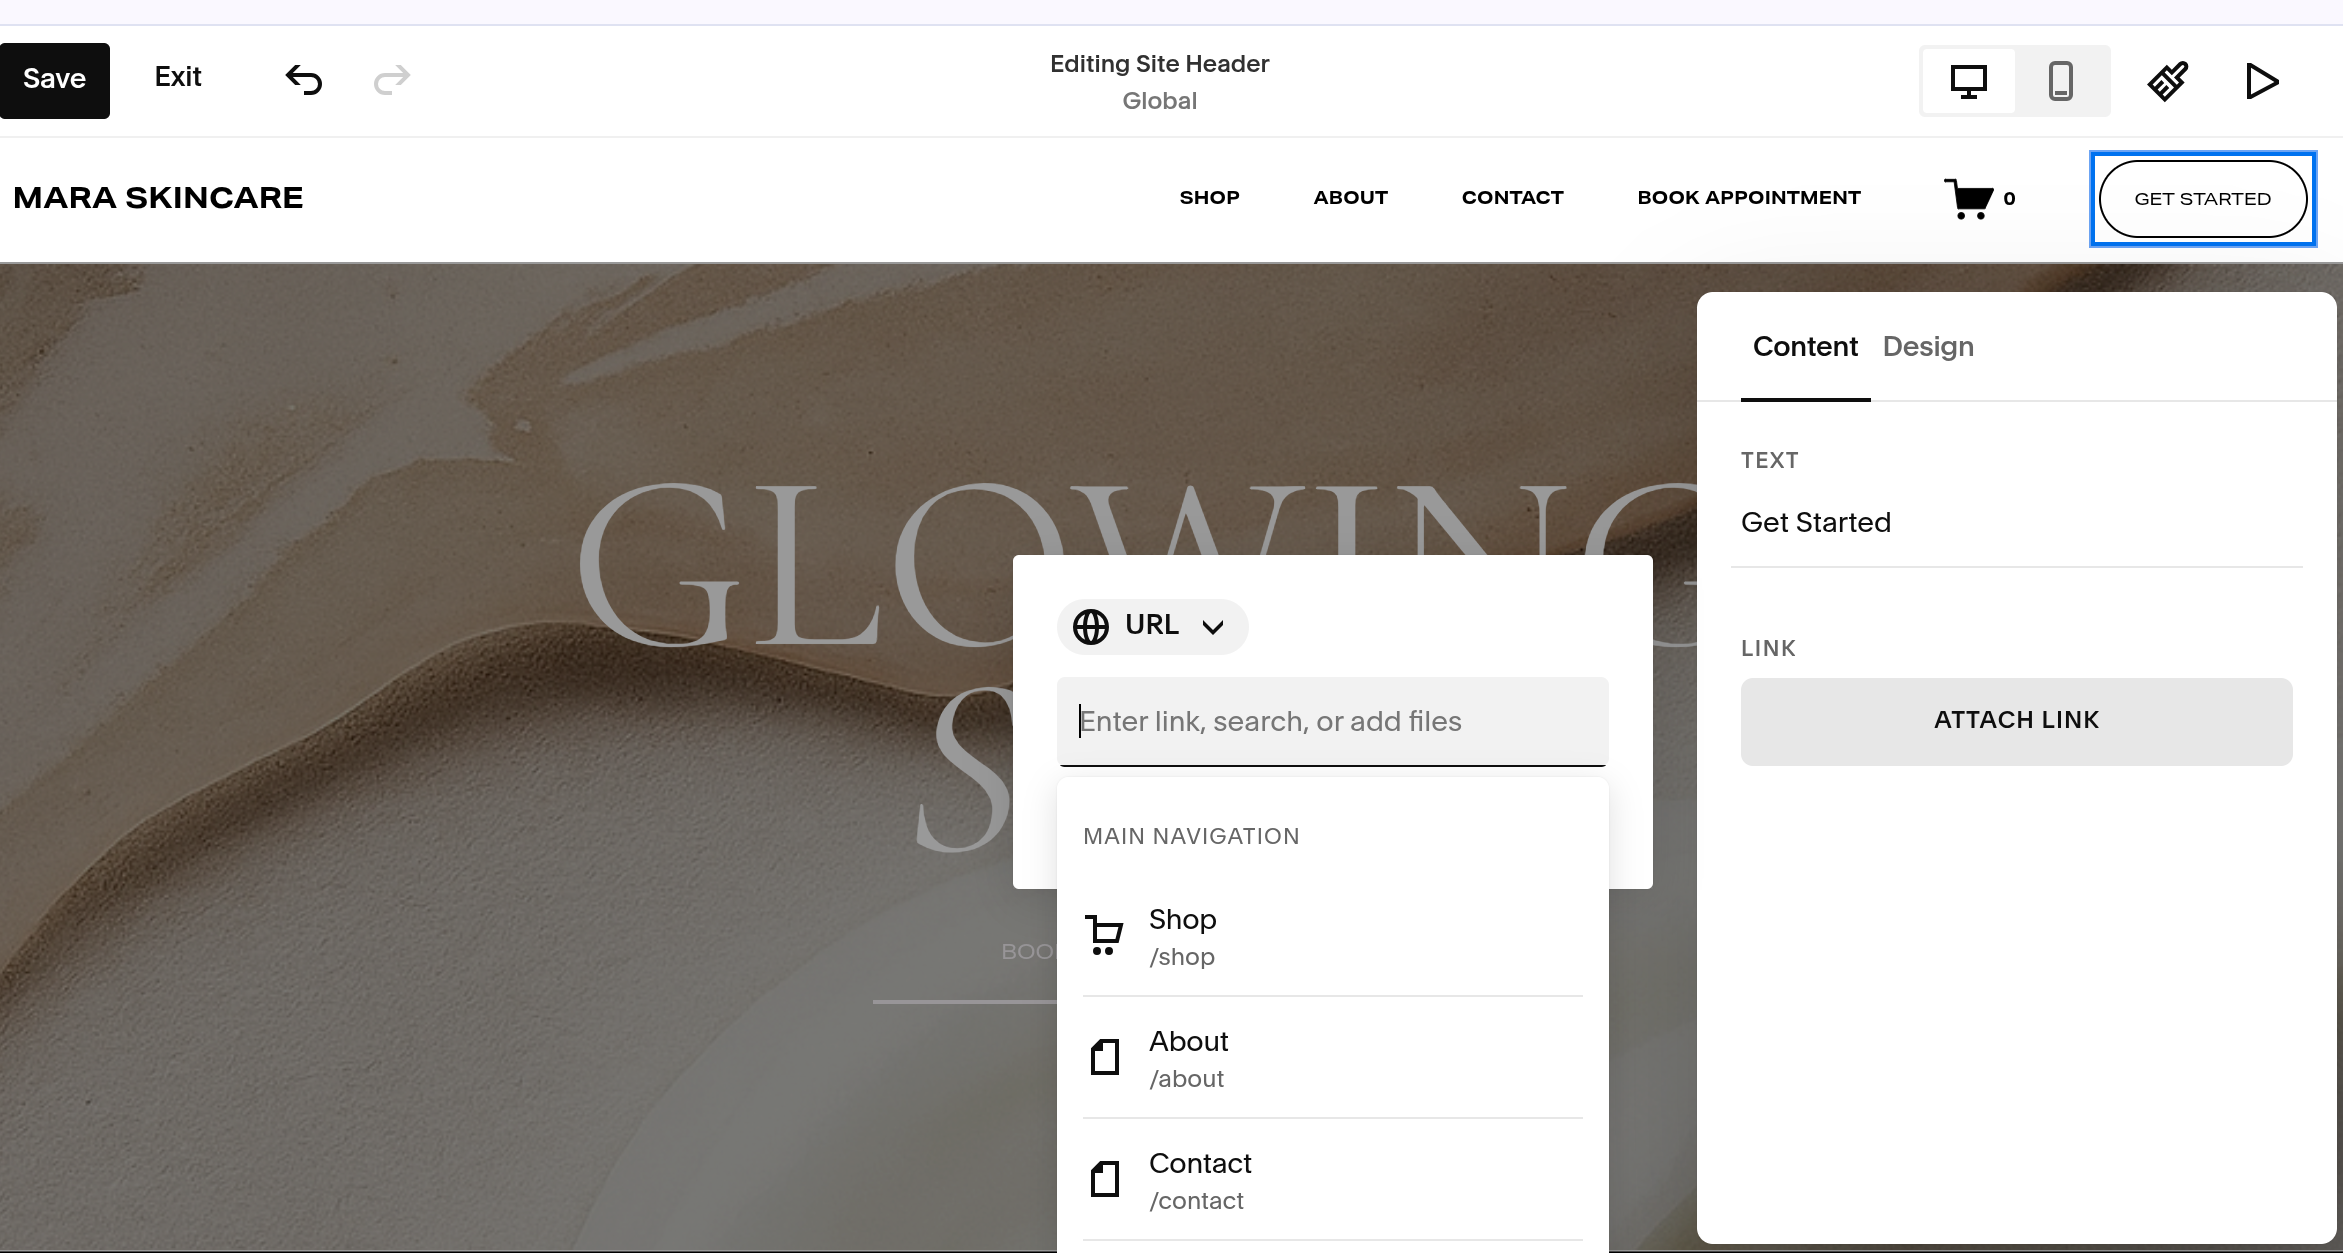
If you would like to include a Call to Action button in your header, it’s rather simple.
First click add element, then toggle button.
From there click on the button to edit the wording and add your link.
Depending on your business, this could say:
Book a Call
Work With Me
Shop Now
Get Started
Contact Me
View Services
Step Six: Add or Remove Additional Elements
While you have the add elements tab open, you can toggle on or off any elements you wish. I try to keep the headers as clean as possible, but choose the most important elements you want your audience to have access to!
Step Seven: Changing Header Color
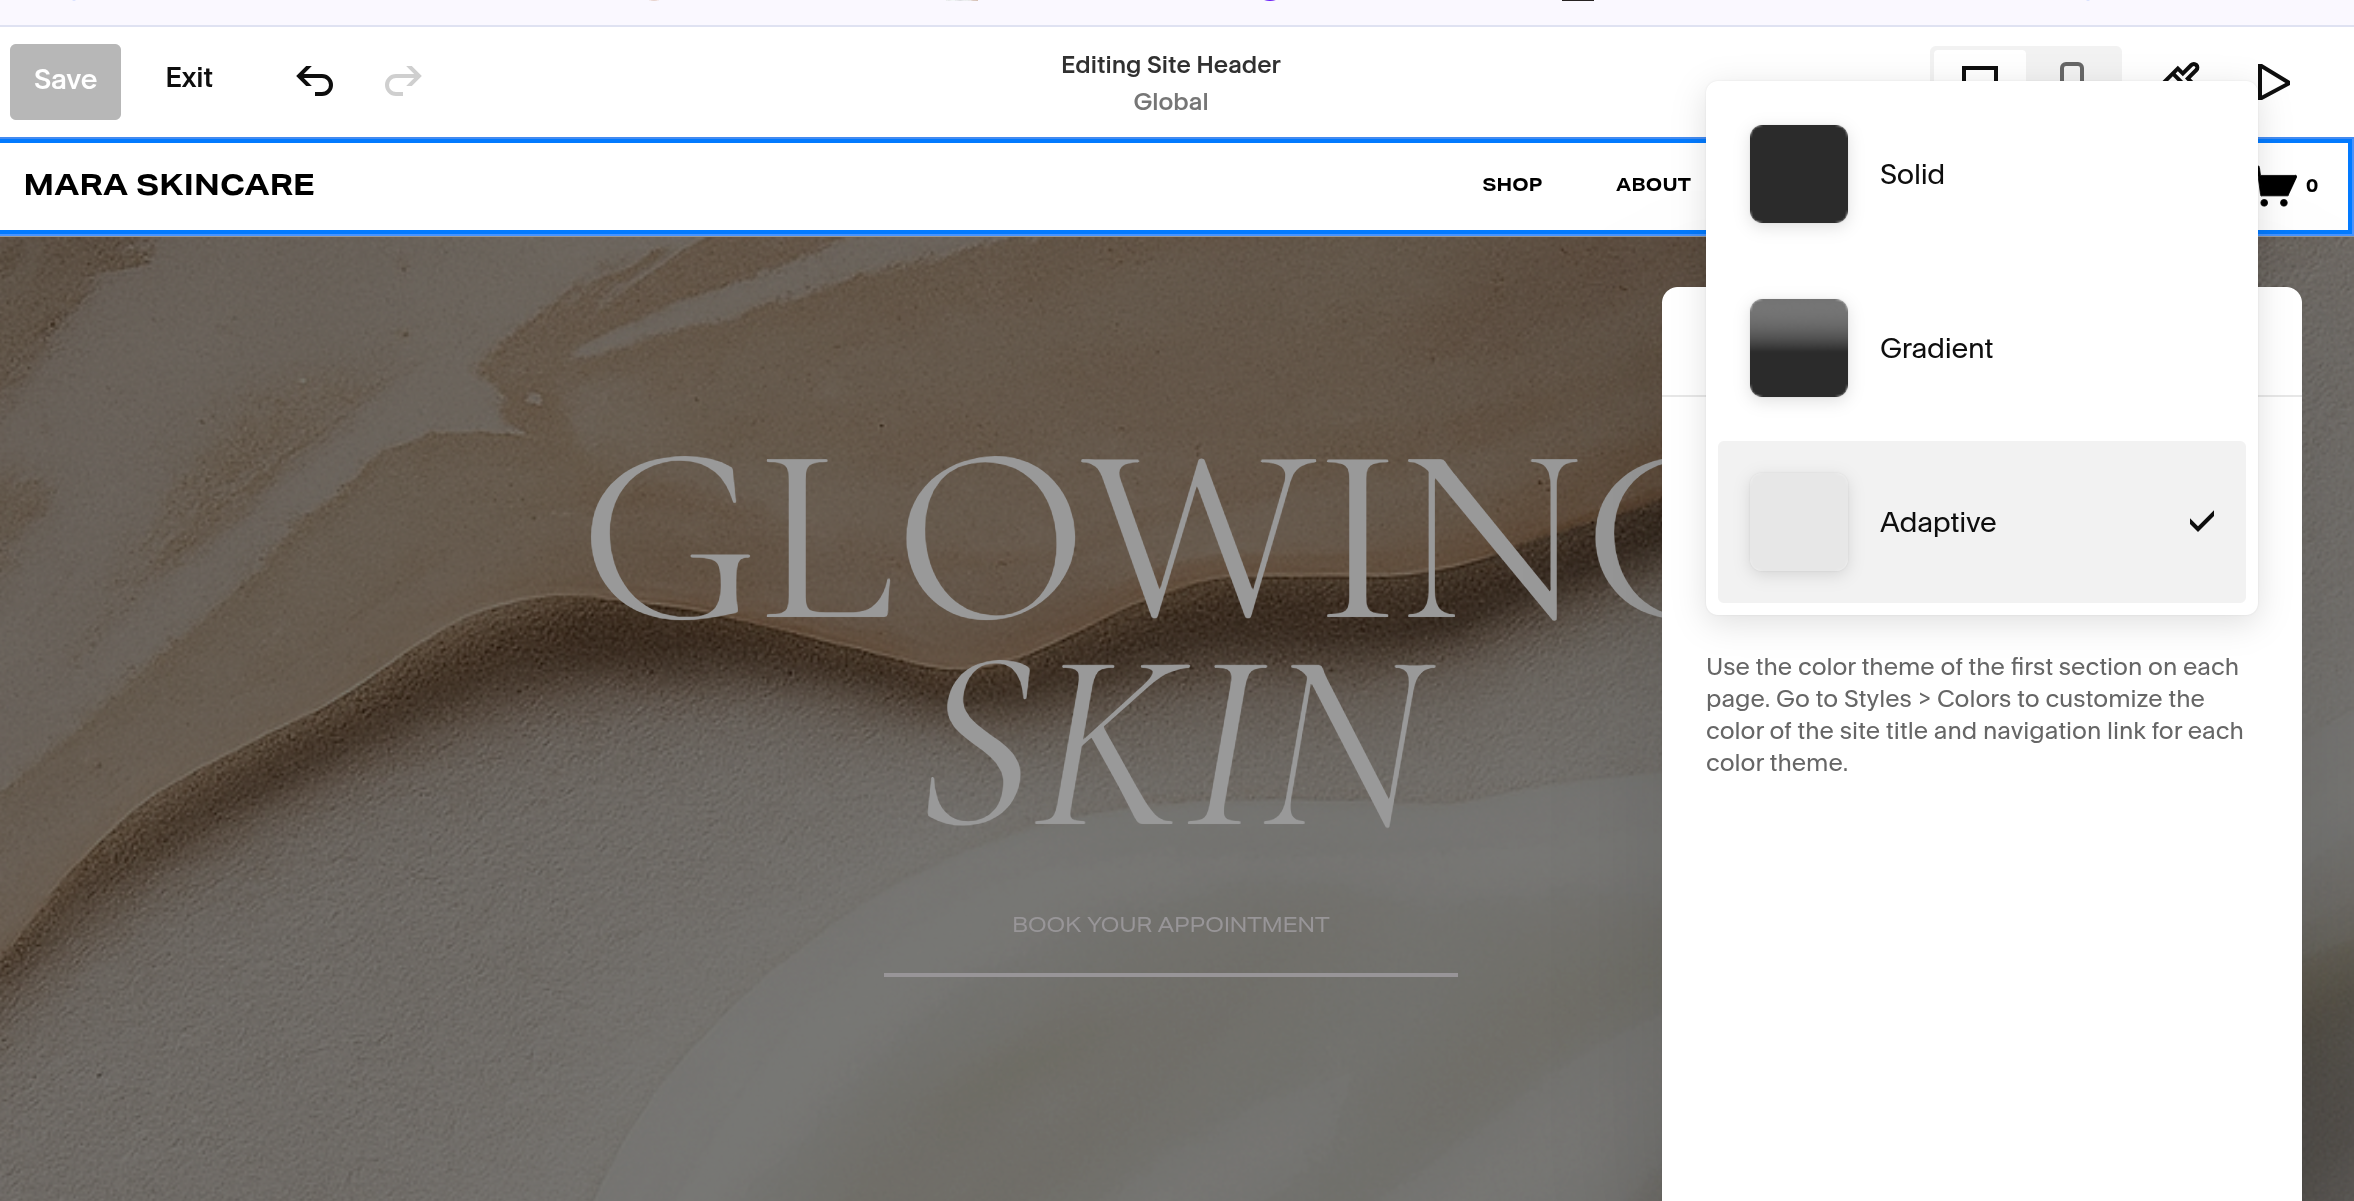
Currently you have three options when it comes to the header colors. My templates all typically start with adaptive, which means it matches and uses the color way of the first block.
If you rather have a universal theme, select solid color and adjust the background and font color within the panel. Gradient is a third option that is available, but I personally have yet to try it for web design.
Step Eight: Additional Design Elements
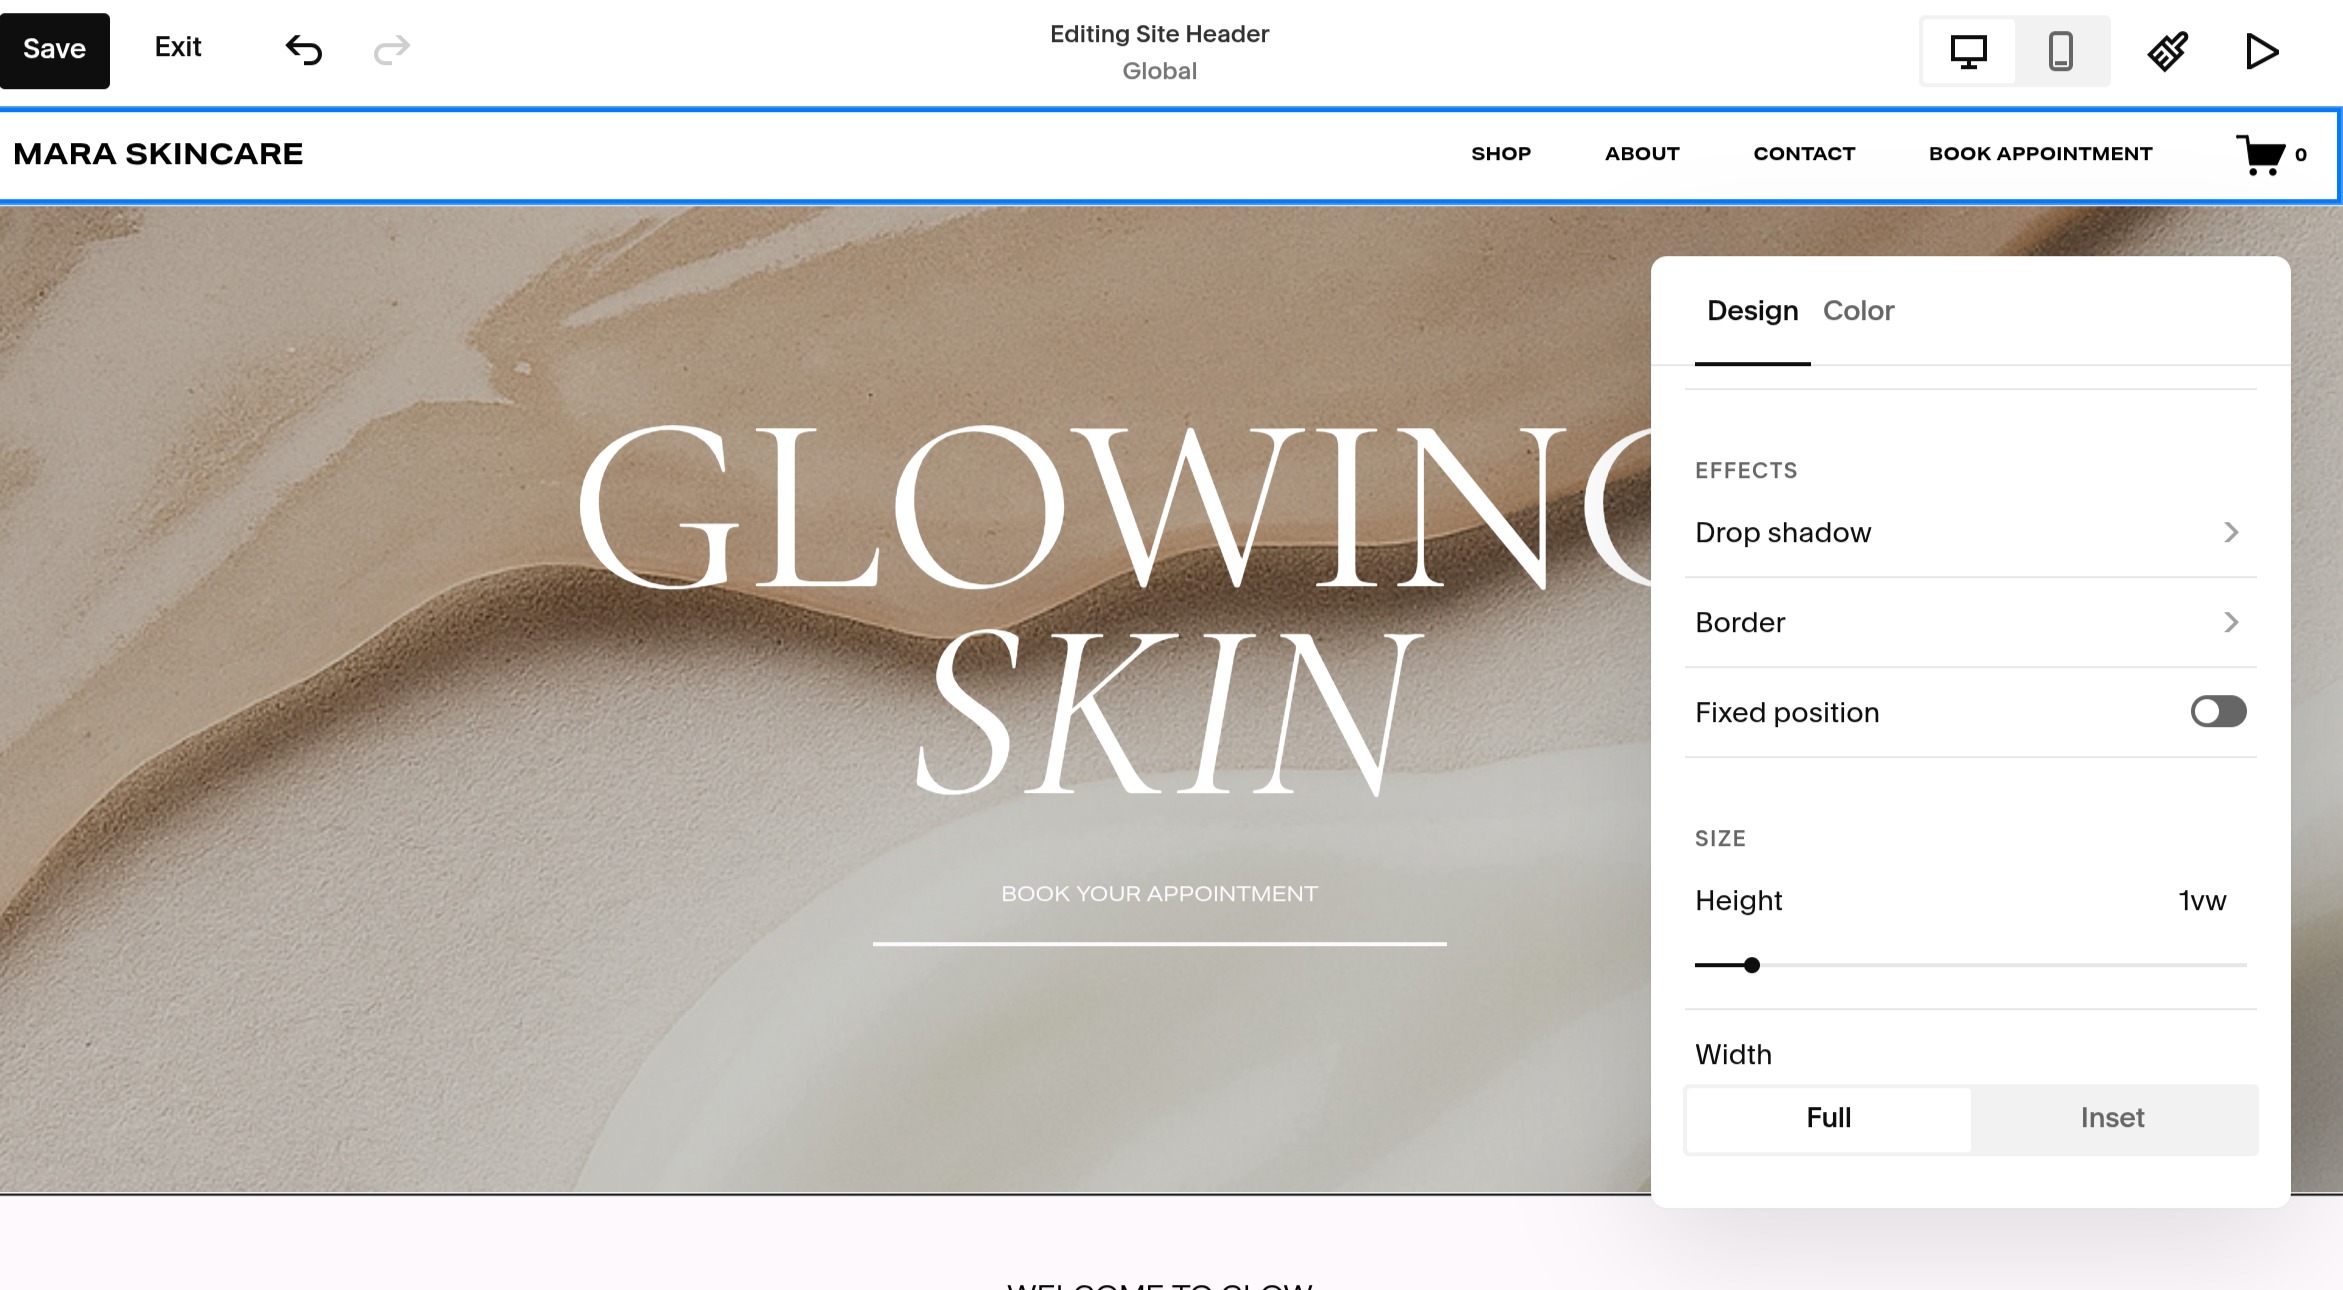
Now that you have the most important parts setup, this is where you can add a bit of flair! Under the Edit Design tab, you can scroll down to see drop shadow, border, fixed position and height. These elements adjust the visuals of your header. I find a drop shadow to really highlight the menu bar, while a border is great if you use dividers throughout your website theme. The height is also a wonderful way to make the website more editorial (smaller header) or pronounced (larger header).
Have some fun and experiment with these options to see what you prefer!
